 |
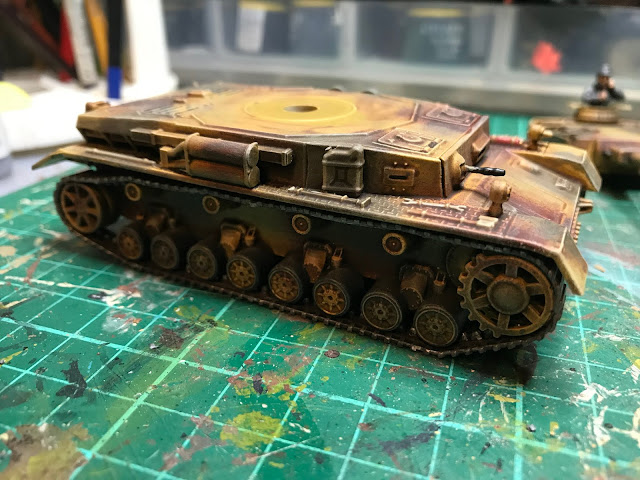
| Running gear, tracks and side skirts assembled & sprayed |
So you'll notice evidence of it's recent use in both past and future posts.
The first finished AFV I'll talk about was the Warlord Games Panzer IV which can be built as an Aus F, G or H.
The model was moulded in grey polystyrene and pretty well flash free.
 |
| Hull and turret assembled and sprayed |
One departure I made from the assembly instructions was to leave off the running gear until later. I assembled these on the sprues (i.e. added the drive sprockets and rear idler) but left them attached for now to ease the spraying.
The track links (one top piece and one lower run of track) where also painted on the sprues. To do this I spray them Matt Grey and then a coat of Vallejo Flesh Wash (looks good as rust too!) followed finally with a dry brush of Silver on the raised edges.
 |
| Details brush painted in - tyres, tools & extinguisher and weathering begun |
 |
| The crew half-figure supplied with the kit |
The turret spaced armour needs care to attach correctly, but once on, and thoroughly dried, it is strong enough to cope with repeated handling.
 |
| Track units completed and touched up, ready to attach to the hull sides |
The side skirts were assembled off the model ready to attach as the very last job. These each had four strongly moulded brackets by which they will be hung from the tank's hull.
 |
| Track units attached and hull has been dry-brushed |
Once thoroughly dry (my Loser Shed is a little cold at this time of year and paints take some time to harden so I left these overnight to be certain) I painted in the details like the tyres in dark grey, pioneer tools, extinguisher etc.
 |
| Turret completed together with commander figure supplied. |
I assembled the track units off the vehicle, touched up the paint where needed and then attached them to the hull.
Finally I added the side skirts. These need a lot of care to ensure the brackets have all adhered strongly to the hull. My first attempt failed when I picked up the model squeezing the side skirts, and as I did they came away.
 |
| attaching the side skirts..... |
A smashing little model when completed, quite robust as long as I'm careful with those side skirts.
I bought mine at Reveille II for just £16 which I think was a very good price. Build time is very quick, quicker still if you're going to brush paint it! You won't be disappointed.


No comments:
Post a Comment