E-Mail:

If you enjoyed visiting this blog, please feel free add a comment after the article in question :-)

Search This Blog

Showing posts with label Cruel Seas. Show all posts

Wednesday, 6 March 2019

Cruel Seas - First Game AAR

I played my first Solo game of Cruel Seas a couple of weeks ago and thought it might be worthy of an after action report. I had genuine fun playing this game which I have to say, really lends itself to solo play with the random dice activation mechanism.

I chose to play the 2nd scenario from the book, where a cargo vessel/tanker has to travel from right to left, protected by two S-Boats from three Vosper MTBs.

I played this on a 4 x 3 foot table area, using my GW Dreadfleet cloth play mat and some simple terrain (Modular hill doubling up for land and some random rocks).


Move 1: The three MTBs start from stationary as the S-Boats peel off to head them off before they can reach the slow moving tanker.


Move 2: A chance to find out how decisive (and bloody) Cruel Seas can be! My right hand MTB was caught off-guard by the two S-Boats and, with some lucky dice rolls, sunk!


Move 3: The remaining two MTBs continued regardless and positioned themselves to launch a brace of torpedoes each. Meanwhile the S-Boats swung round to attack them from the rear.


Move 4: The torpedoes from the centre MTB failed to have any effect and those from the left hand MTB completely missed the tanker. The S-Boats started to engage the remaining MTBs - one each.


Close up of the moment of impact
Move 5: The left hand MTB found itself in the path of the Tanker and a collision resulted. The MTB was left severely damaged, but managed to limp on past the Tanker, which was itself, largely undamaged by the encounter. The centre MTB was engaged by one of the S-Boats and sunk....


Move 6: The game was academically over now, but I played out the last few moves to see the Tanker leave the board. The nearest S-Boat slowed to a halt to avoid colliding with their Tanker, while the other S-Boat set off after the damaged remaining MTB.


Close up of the last engagement
Move 7: The S-Boat caught up with the MTB by the rocks at the top of the picture. A brief gun battle proved inconclusive (due to the relative speeds of the two vessels) and the last MTB made their escape. The other S-Boat manoeuvred while stationary, to avoid both the Tanker and the rocks.


Move 8: As the last MTB limped off the board towards safety, the two S-Boats were both having to do some careful manoeuvring to avoid hitting rocks/land obstacles. Meanwhile the Tanker exited the board - Victory to the Germans!

Naval wargaming for me is just a pleasant diversion from what I usually do. Therefore I don't see me buying any more ships than I have already (maybe print some though😄). However, I will certainly play the game again.....it's fun! I know there are a few house rules appearing to try and make things "more realistic" but, to be honest, I don't have any need for them on the experience I've had so far.

Hats off to Warlord, a jolly good game.

Thursday, 28 February 2019

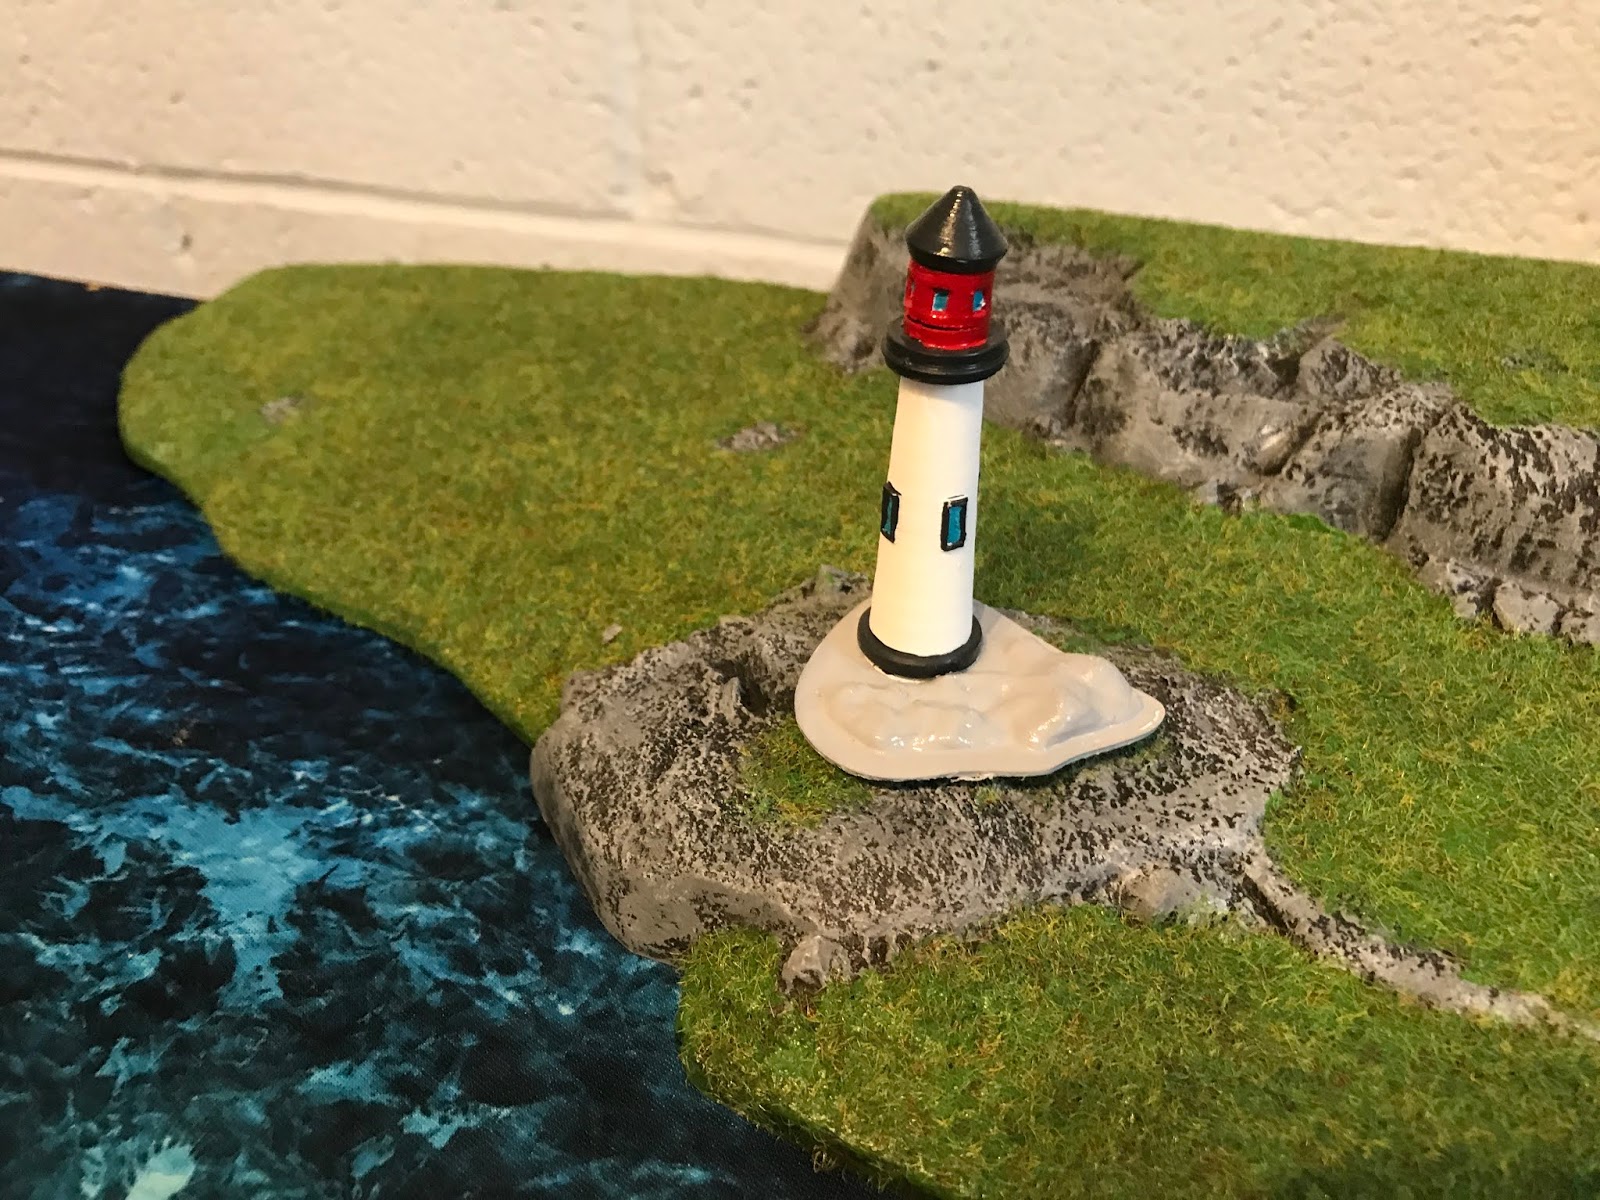
Cruel Seas - 3D Printed Lighthouse

Once again I have been neglecting my blogging duties 😕

As ever the real world has been getting in the way, what with travel, work...and sadly funerals. So I must admit that my recent output has been rather poor.

However, I've been trying out my Cruel Seas collection solo and I must admit I'm quite take with the game mechanisms.

You couldn't wish for something easier to learn and the games look so spectacular on the table that there's plenty to like about it.

There are many 3D printable items turning up on line to use with the game, ranging from actual ships to terrain items.

On thing I thought I needed to make my table look truly nautical was a lighthouse.


This one I found at https://cults3d.com/en/3d-model/architecture/greenwich-lighthouse designed by NAIROBIGUY3D.


It was already correctly sized to 1/300 scale and printed out as 4 pieces that once cleaned up, neatly clipped together.

A quick spray of matt white primed and supplied the piece's base colour. Followed by the details picked out in Vallejo Acrylics.


All I still have to do is texture the base, weather the building and add a little flock. You can, however, already see what it will look like when finished.


A very handsome piece.

Friday, 8 February 2019

Acrylic Movement Rulers - Cruel Seas & Blood Red Skies

JustLasered first came to my attention having read a blog entry from Doctorphalanx way back in May of 2018. 

As well as their extremely smart bespoke foam liners for Really Useful Boxes, I found that they produced additional shelf kits for IKEA Detolf cabinets.

Now their range has expanded to include mdf items (counters, buildings, bases etc.) and gaming aids made from acrylic sheet.

I've seen such items both on ebay and, more recently, at Crusade, however none have been as well priced as the items from JustLasered.

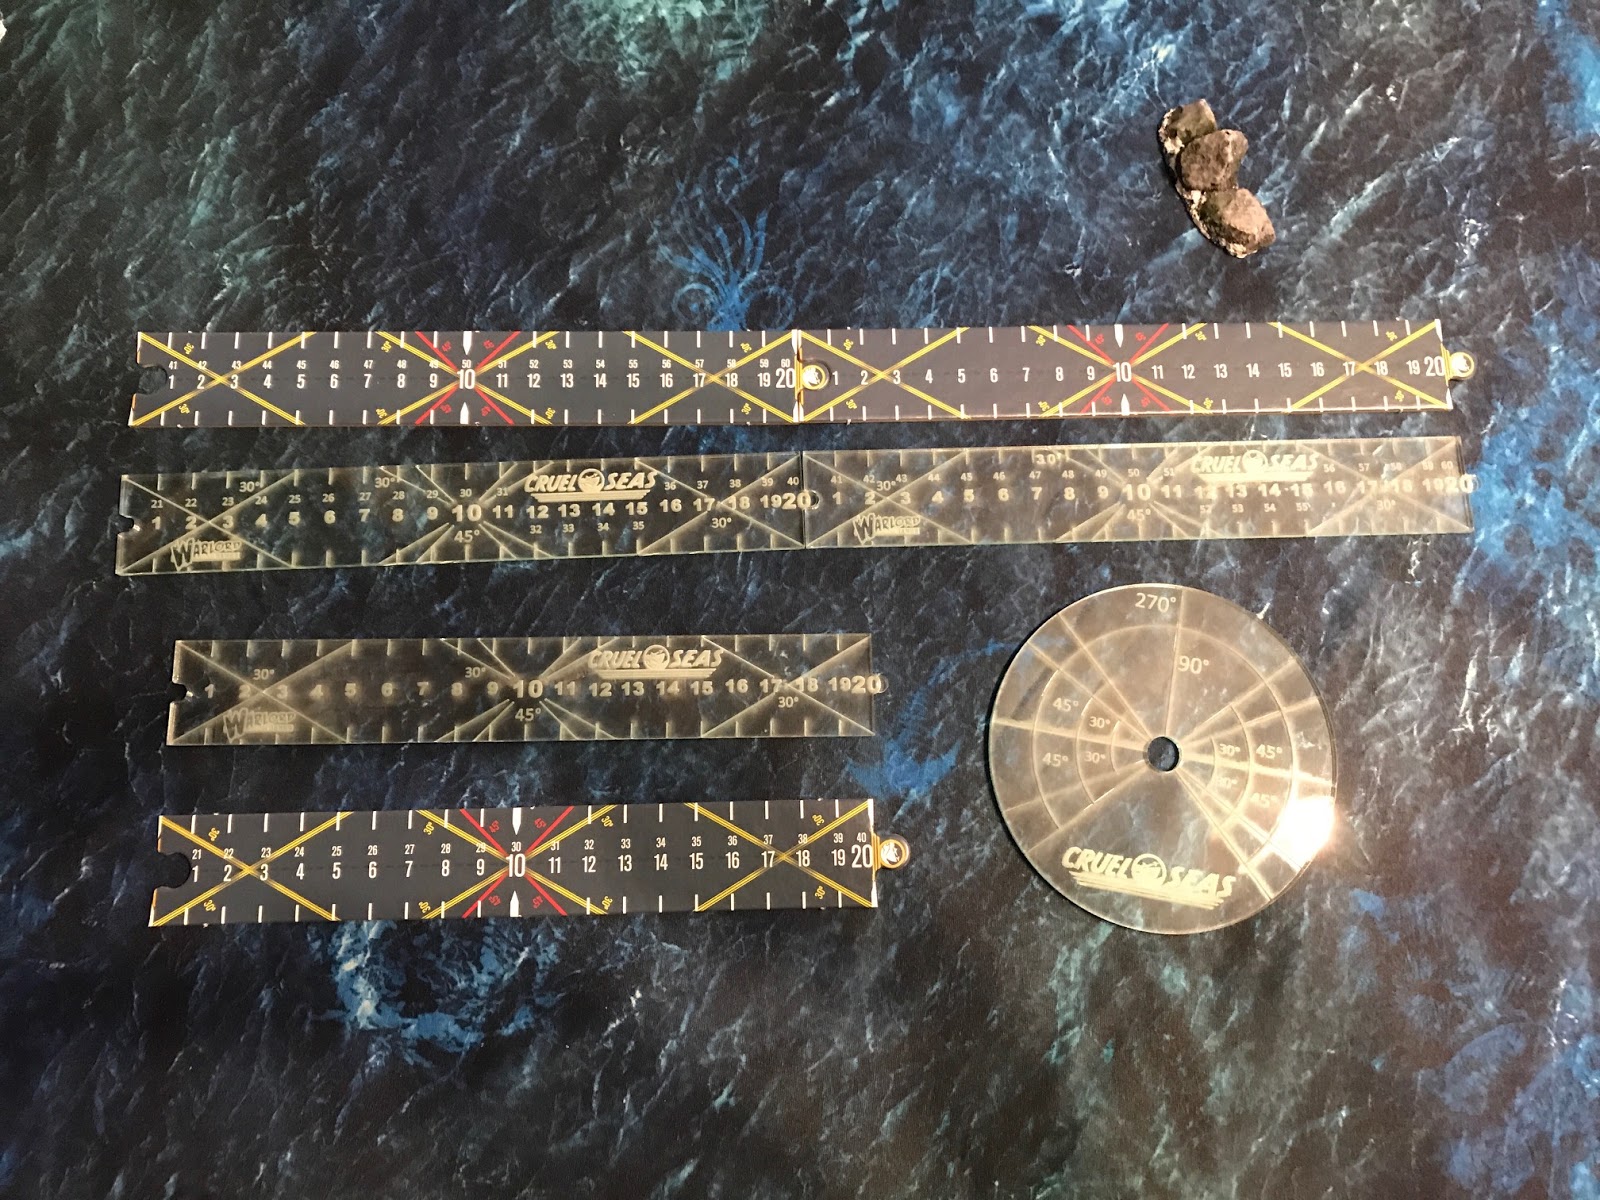
I treated myself to two sets. Firstly the set for Blood Red Skies comprised of two Acrylic movement rulers, range and angle finder. Which comes with the etching on the reverse side of the glass clear acrylic and only requires the protective film to be removed before use. The quality is excellent and at only £4.25 the set - very good value. Additionally, you can have them in just about any colour you want.

JustLasered pieces alongside the cardboard game pieces

While I was at it I ordered the set designed for Cruel Seas as well. This was another 4 piece set comprising  3 movement distance templates and 1 arc template for shooting/turning. As above the quality was excellent and at £4.75 for the set - another bargain.

JustLasered pieces alongside the cardboard game pieces
The cardboard pieces provided with both games are both adequate for initial use, but inevitably they will become worn out. These sets from JustLasered provide a very affordable alternative.

While I was placing the order I added one of their mdf small artillery bases as well. These are just £1.25 each (90p if you order 3 or more!) and are perfect for mounting an anti-tank gun for instance, allowing casualty figures to be removed one-by-one.

The small artillery base with a Rubicon Pak40 for size comparison
Just the job.....though stupidly I bought 4 more artillery pieces the day after ordering these so I'll have to buy some more (large & small)!

To top all this the guys at JustLasered refunded me £1.75 to our PayPal account as the website had overcharged for P&P! How's that for service.

Thoroughly recommended, check them out!

Monday, 28 January 2019

Cruel Seas - 3D Printing

One of the things about Warlord Games Cruel Seas that has impressed me is the amount of items that have become available for 3D Printing to support the game.

Double-sided Sticky Tape
A really good source of these is the "Cruel Seas - The Dock Office" Facebook group. It was here that I found my first 3D print - a three dimensional rendering of the cardboard freighter included as a template with the starter set.

Lifting prints - blue tape coming away from the bed.
Now I have a Wanhoa i3 hobby printer which has a very small (12x12cm) print bed. Most of the larger cargo vessels are much bigger than this and I'm afraid my technical prowess does not stretch to cutting up 3D designs to make them fit!

Trying printing with the parts orientated the other way...still lifted
Enter TheGreg1980 who has very kindly done just that! His  freighter model that can be found at https://www.thingiverse.com/thing:3345466, is cut into 3 pieces which will all fit on my bed at the same time! 

Third time lucky....about 5-6 hours to print.
I still suffer from the problem of prints lifting from my print bed as they build up, layer-by-layer. I started to use blue masking tape on the bed, followed by a liberal coating of Pritt Stick glue. This worked OK with smaller prints but not so well with anything larger.

MDF base added and florist wire masts
This time I had a brainwave and decided I'd try double-sided sticky tape on top of the blue masking tape!!

 Sea textured with acrylic paste
This worked OK - the print stuck rigidly to the tape - but the tackiness of the masking tape wasn't sufficient to keep that stuck to the bed. The upshot of this was lifting parts again.

Sides repaired with Milliput (before sanding)
I'm going to experiment with another hi-tack masking tape + the double-sided tape, next time.

Gaps filled and sanded
My first go at printing failed when the power lead mysteriously fell out of the rear of the printer and the printing stopped after about two hours.

Matt White primed
My next effort was going fine until I accidentally selected the wrong control and drove the heated nozzle into the finished rear hull with disastrous consequences.

Finally third time lucky I had a print I could use - albeit one which had lifted during printing.

Starting with the deck details
I straightened the hull parts as best I could using hot/cold water and decided the best way to assemble the model would be to mount it on mdf so I could ensure alignment and more easily fill any gaps.

I found two pieces of scrap mdf from another model, that glued together would make an ideal base. I then stuck the two hull halves onto the mdf using a "No More Nails" grab type adhesive, which had the advantage of filling most of the gaps around the hull base.

Finishing with hull etc.
Once thoroughly dry, I filled the remaining gaps and tidied up the sides of the ship with a little Milliput. Then textured the base using artists acrylic paste applied with a pointed pallet knife. This really is effective at simulating waves etc. The masts were added from florist's wire super-glued into the pre-printed holes and the bridge was super-glued to the superstructure on the rear hull.

I primed the vessel with matt white spray before painting the details with Vallejo Acrylics.


  • The main deck - Dark Grey
  • Rear Deck - Khaki Grey
  • Windows - Sky Blue
  • Lifeboat - Leather Brown
  • Funnel Black with a Red stripe
  • Hold Doors - White
  • Hull and remaining superstructures - Light Grey
  • Overall highlighting - matt white dry brush


The rust streak effects were made using a mixture of Flesh Wash + Orange Brown.

Sea painted with Blue Wash 
The sea was painted over with Army Painter Blue Wash and once dry, dry-brushed twice with Matt White to pick out the wave tips.

Hi-lights, weathering (Rust) and waves added to finished model
A quick coat of spray matt varnish to tie all the finishes together an she is ready for the table.

Ready to go!
A perfect replacement for the cardboard template, and a proper target for my torpedoes!


Friday, 11 January 2019

Warlord Games - Cruel Seas Finished Boats

Yesterday I completed the remaining vessels for Cruel Seas. All have been painted with a mixture of Acrylics (Vallejo & Citadel) followed by firstly a coat of Army Painter Satin Varnish and finally a coat of Anti-Shine Matt Varnish.

Vosper MTB I
Paints etc. used finishing both the Vosper MTB I & II were:-

  • Poundland Grey Spray Primer - overall undercoat
  • Grey blue - Deck & upper surfaces
  • Light Grey - Cockpit, Torpedo Tubes and any other above deck fixtures
  • Sky Blue - windows
  • Desert Yellow - wooden features (i.e. poles)
  • Yellow - Inflatable Dinghy
  • White & Red - life belts
  • Black - MGs
  • Camo Beige - ropes
  • Light Grey Vallejo Wash - over all surfaces of the  model
  • White - very light dry-brush
Vosper MTB II
The pennants from the starter set were simply cut out with a scalpel, folded and glued with PVA. Once dry they were attached to the mast with a thin bead of superglue. Finally the cut edges were blended into the printed surfaces with light grey Vallejo wash.

The ID Number decals were from some old Dragon 1/144 AFV kits.

S38 S-Boat

Paints etc. used finishing both the S38 & S100 S-Boats were:-
  • White Spray Primer (Wilko's) - Overall undercoat
  • Dark Grey - Deck & upper surfaces
  • White - Cockpit and any other above deck fixtures
  • Chain-mail Silver - Torpedo Tubes
  • Sky Blue - windows
  • Desert Yellow - wooden features (i.e. decking)
  • Black - Torpedo tips, Cannon Barrels & MGs 
  • Light Grey Vallejo Wash - over all surfaces of the  model
  • White - very light dry-brush
S100 S-Boat
Once again the decals came from my spares box. 

To fly a pennant a mast has to be added to the model. To do this I cut 20mm lengths of florist's wire, heated them in the flame of a candle and positioned them just behind the bridge. A small bead of superglue was added to ensure they never fall off.

The rust effect is obtained using a 50/50 mix of Vallejo Flesh wash + Orange Brown. This can then be added at likely rust spots (joins, edges doors etc.) and some "runs" added for effect.

Elco & Higgins PT Boats
And lastly my two free PT boats were finished in a Pacific Theatre finish. I've since learnt that they were supplied to the RN for use in the Mediterranean. So I could have painted them up the same as the Vospers. Oh well, not to worry. They'll come in for something one day.

Paints etc. used finishing both the Elco & Higgins PT Boats were:-
  • Poundland Grey Spray Primer - Overall undercoat
  • Brown Violet - Hull, Deck & upper surfaces
  • Dark Green - camouflage pattern
  • Light Grey - Torpedo Tubes
  • Leather Brown - ship's boat
  • Sky Blue - windows
  • Yellow - inflatable dinghy
  • Black - Cannon Barrels & MGs 
  • Black Wash - over all surfaces of the  model
  • Iraqi Sand - very light dry-brush
So there you go. All finished and ready to go. Hope its of some interest to those who have yet to start their paint jobs!


Tuesday, 8 January 2019

Cruel Seas Ship Data Card Holder - Mango Terrain

I found these rather interesting items on eBay the other day.
(https://www.ebay.co.uk/usr/mango_terrain?_trksid=p2385738.m4383.c10)


They are simply designed mdf card holders that also allow you to track the loss of hull points value as your vessel takes hits.


Starting at £2 each (for a pack of 4), the price drops the more you purchase (£1.50 each if you buy 6). This price includes post and packing and, as you can see from the picture above, they come well packed. Time from placing the order to arrival was just 5 days.


A little assembly is required but it's not a big deal and instructions are included. The main parts come on two mdf sheets, the parts push out cleanly and you can glue them together with either PVA or (if you're in a rush!) SuperGlue.


The rings that slide over the hull points values come in a separate bag. Be careful to let the assembled sliders dry completely before completing assembly to ensure they can slide smoothly.


It's your choice whether you paint the finished item. I chose to just paint the rings red to help them stand out a bit more, but left the rest. If you turn the finished card holder over, there is a window cut out to reveal the points values printed on the card's reverse.

I rather like these. I think they are practical, good value and will prevent the cards coming to harm. The slight raised edge will also avoid damage counters ending up on the floor if the table gets knocked accidentally!

Thoroughly recommended.

Monday, 7 January 2019

Zvezda 1/350th Project 1125 Armoured Patrol Boat - Cruel Seas Russian Fleet?

I saw these little models in the Hereford Model Centre just before Christmas and bought two as I thought they'd be just about the correct size to fit into Cruel Seas (at allegedly 1/350th scale).


Designed to go with their Art of Tactic game, the models were simple clip together items coming on a single sprue of green polystyrene.


Having now built them I'm not convinced they're truly 1/350th as they seem smaller than I'd expect them to be. However, looking at on-line pictures of the real thing it wasn't that big.


The model includes a scenic (water) base to display the model on, and of course a flag and associated hole for the game requirements.


There are choices to be made...T35 or T34 armoured turret to fit and T35 MG turret or Katyusha rockets.


Altogether a simple, quite finely detailed little model when built.


There are a number of colour schemes to choose from when you search on-line and I opted for a simple base coat of grey with light green stripes for camouflage.


The bases were painted the same way I painted the U-Boat - base coat of a grey blue from Vallejo, followed by Army Painter blue wash. Finally several dry-brushes of white were added until the desired effect was achieved.

Not sure if they will ever see the light of day on a table, but nice enough models all the same. At only £2.99 each they won't break the bank. I'm unaware if Zvezda have any plans to produce similar scaled opposition, but will keep my eyes peeled.