E-Mail:

If you enjoyed visiting this blog, please feel free add a comment after the article in question :-)

Search This Blog

Showing posts with label 10mm. Show all posts

Tuesday, 28 April 2026

Wargames Atlantic Grand Scale Boneblades

 When I first wrote my “About Me” blurb for this blog, 15 years ago, I waxed lyrically about my love of all things Warmaster. They are my all-time favourite wargaming rules with what I consider to be the most elegant  mechanisms which have spawned many clones (Black Powder, Hail Caesar, Blitzkrieg Commander etc…)

My Original Warmaster armies from 2000 are some of my most treasured wargaming figures and when I became aware of Wargames Atlantic’s (WA) move into 10mm fantasy figures I felt the need to investigate further.


I purchased the pack of Boneblades to test the water, from Firestorm Games for the princely sum of £16.20. For this you get three sprues of figures in grey polystyrene and a sprue of bases. Each sprue contains 39 x 10mm figures giving you a total of 117 figures in the box along with 9 x 40mm x 20mm bases.


In total there are-

  • 108 Skeletons with Sword and Shield (9 bases)
  • 3 x 2-Skeleton Command
  • 3 Casualties
  • and 48 skulls!

I had very quickly decided to base these up for Warmaster. In fact, there’s sufficient figures to create three infantry units (each of 3 stands) with a few figures left over. There were sufficient correctly sized bases to do this as well as a  number of 1 & 2 figure bases.


The bases are well designed. They can be used either way up, 1 side plain the other recessed with the lip aiding the application of texture. Each contains holes ready for 3x1mm magnets if you wish.

The bases will take two ranks of 6 (with a little base clipping) so will look just like the original GW items when they are finished. The figures themselves come in 5’s, 3’s 2’s and individually based.

They need very little cleaning up once clipped from the sprue and to start with I glued the front rank of 6 onto each base. I then textured the area around the figure’s bases with Vallejo grey pumice. The rear ranks were, for painting, attached to coffee stirrers with PVA.


I opted to use the command figures (with a banner and trumpet) in the centre of the front rank of one of the bases, rather than separately on a smaller base as I think WA had intended. This was to match the GW originals.


All these figures were then sprayed in matt white primer.


There is nothing as simple as painting a skeleton!! They all received a coat of Skeleton Horde Contrast Paint and were left to dry.

Next the shields were painted with Army Painter Satchel Brown.


The weapons were picked out using an AK Silver Playmarker (Great piece of kit!!), and the flag in Red Contrast paint.

The Ram’s Head on the flag was painted with Army Painter Golden Armour and the Helmets in Talos Bronze.


And that was them finished!


The front part of the bases was painted using another AK Playmarker in Wood before attaching the second rank of figures.


Then the remaining gaps in the texture were finished off with some more Vallejo Grey Pumice before finishing off the painting with the Playmarker.


When everything was dry the bases and shields were lightly dry brushed with Vallejo Iraqi Sand.


The casualty figures and skulls were a neat addition and were put to good use creating a hit counter for each unit. These were 3D printed to take a 7mm die and textured with more Vallejo Grey Pumice.


They were then finished in the same way as the other figures, and finally everything received a coat of ultra matt varnish.


These have been great fun to paint and base. All that was required was the paints in the photograph below.


The sculpting and quality is very good, I would happily buy the Orcs & Dwarves that WA manufacture without hesitation. These will be a nice little booster to my Undead Warmaster army and will encourage me to get them on the table once again!

Wednesday, 24 June 2020

Desert War - 'N' Gauge - Part Three


Further re-enforcements have hit the table for my Desert armies.

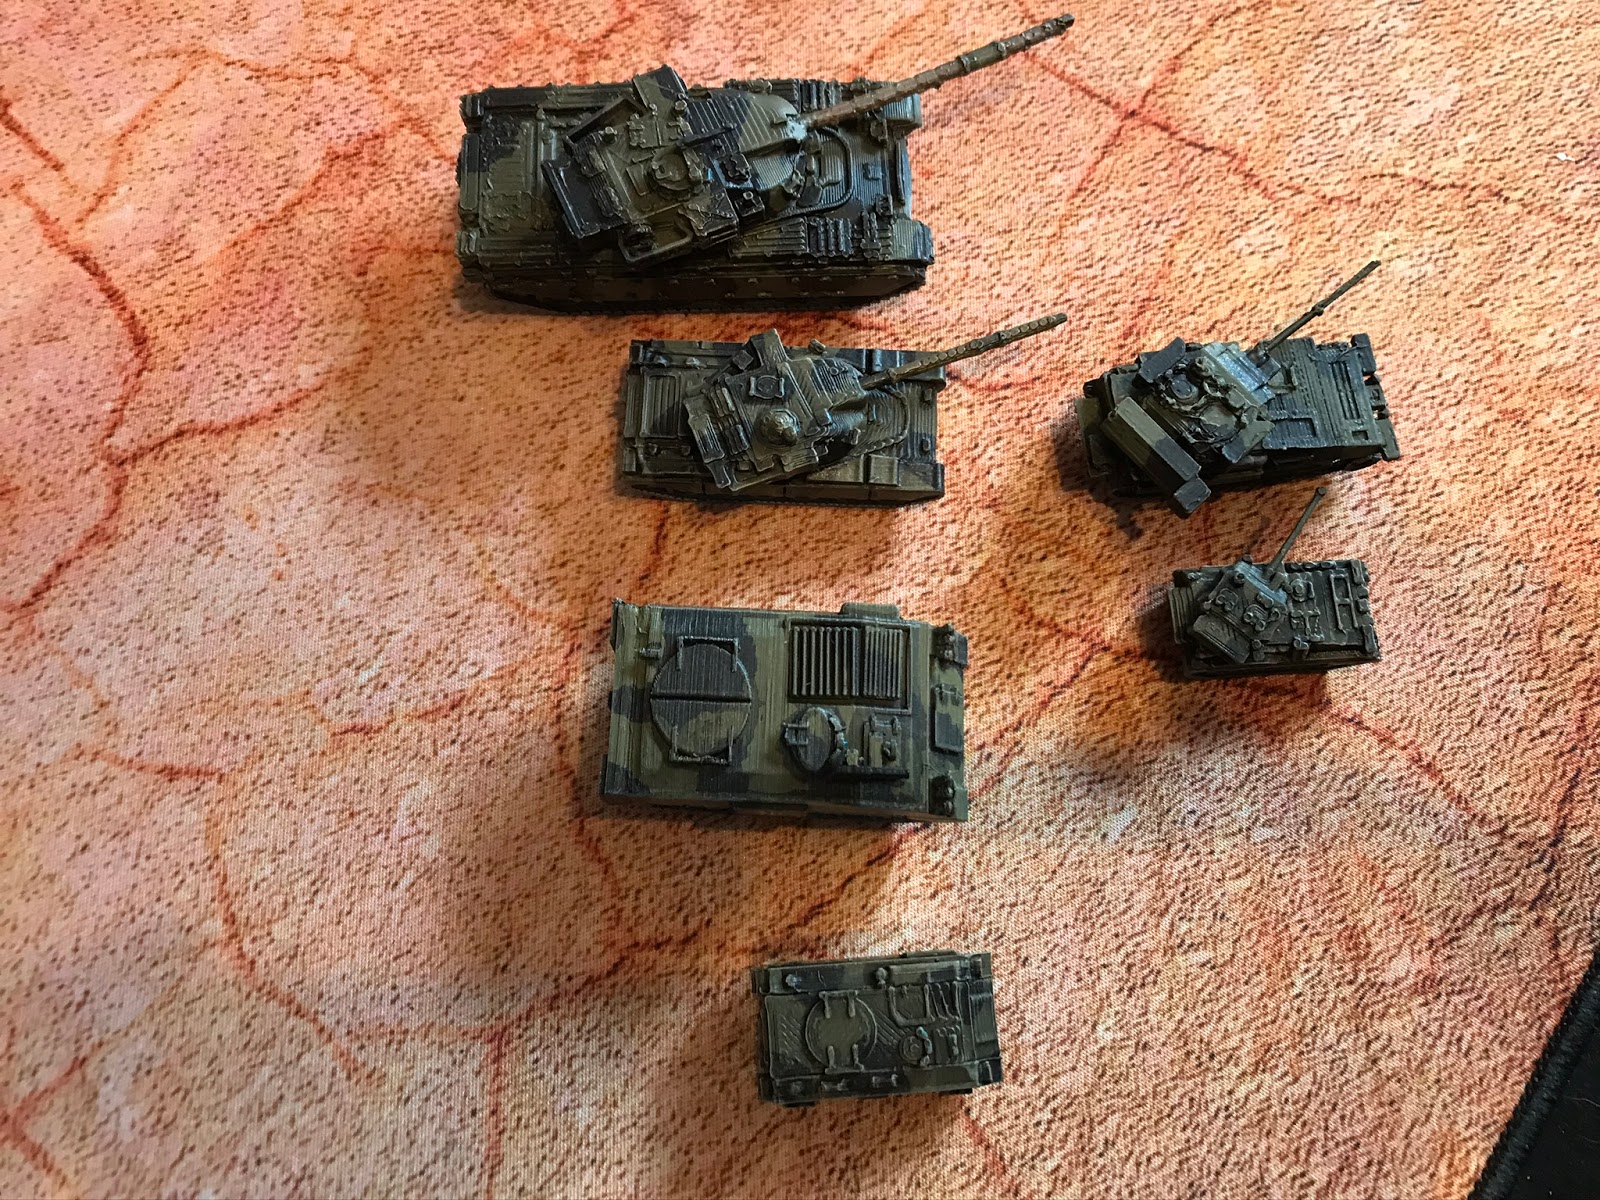
For the British & commonwealth forces there are now some Matilda IIs, Churchills, Bishop SPGs and Daimler armoured cars. All Marco Bergman files from Thingiverse, some form his 1:200th and others his 1:100 range of files.


I really like the Caunter camouflage scheme for British armour. It brings a spot of colour to an otherwise drab period.


In fact, most British vehicles had camouflage of some description or another. Base coat of sand with darker patches or wavy lines in a much darker colour. 


This could be black through chocolate brown or even a dark green. The effect of UV light on paints of the time can be quite dramatic, so any darker colour is feasible.


Then there are the Italians!


A small force of Italian AFVs made up of M11/39, M13/40, P40, Semovente 75mm, AB41 Autoblinda armoured cars and Saharina scouting vehicles with 20mm Breda cannon.


Great fun to paint as there are many possible paint schemes you can adopt and quite a flexible bunch of vehicles as most of them were also used by the DAK and later in Italy itself and in some cases even used by the Allies.


I’m coming to the end now. I may still add a few MKVI and CV33 Light tanks, but these may prove too challenging to print on an FDM printer. Some priest SPGs may be worthwhile additions as would some anti-tank gun towing vehicles i.e. Horch 1500s.


More importantly, my Minifigs infantry order has arrived so I need to get these based up and painted.


Monday, 22 June 2020

3D Printing Wargame's Markers

Whilst searching online for a file to modify to create my Palm trees I stumbled across a simple file for a bush for use in the Gloomhaven board game. (https://www.thingiverse.com/thing:2328240)

It occurred to me that this roughened "ball" could be the foundation for several other items for use on the table.

Firstly, I combined five together and enlarged them in 3D Builder, to produce a 75x25mm (3x1") smoke marker. Printed in black PLA they only required a dry-brushing of white to finish them off.


The next idea was to stack several smaller balls up on a 25mm diameter base to create a smoke stack to indicate a burning vehicle.


Finally five in a row printed on a 2mm thick base will make a very serviceable hedgerow.  This particular file could be stretched upwards and squeezed inwards to produce taller, narrower hedges to suit  a variety of different scales. I will experiment further with this.


Other ideas include modelling shell bursts as well as creating small scale deciduous trees. A very useful little file.

Battlegroup Northag AFVs


Having now finally got myself modern armies in both 6mm and 15mm scale, Plastic Soldier Company conspire to rain on my parade with their adoption of 12mm for their new Battlegroup Northag range!

I’m a bit of a sucker for 10-12mm scale so whilst I’m doing my best to resist this new direction, I cannot help but be interested to see what these new models will look like.

Online reviews of pre-production sets look promising. They are using the new ultracast technology (isn’t everyone?) so they are made from a slightly flexible material that appears to take paint without the need for primer?

1/144th compared to their 15mm big brothers
But what would they feel like in your hands and look like on the table?


Well I couldn't stop myself from printing some vehicles up at 1/144th scale just to see! I chose some models designed by "Captain Ahab" available free from Thingiverse (https://www.thingiverse.com/captain_ahab_62/collections) which are designed to print at 1/300th but created at 1/100th scale.


The pictures should tell all. They look great at this scale and would enable larger games to comfortably be played on smaller tables. 

I must remain strong and resist.......

Wednesday, 3 June 2020

Desert War - 'N' Gauge - Part One

Once again, the wargame's butterfly in me has taken me off on a tangent.

This time it was the lure of a particular era of armoured fighting vehicles - the war in North Africa.

Both armies so far, surrounded by suitable terrain pieces
I started off thinking I'd print off a few 'N' gauge vehicles to play some What a Tanker, but I liked what I'd produced so much this project quickly grew.

The DAK force - spare turrets for the MkIVs armed with short 75mm are to the left.
So far I've printed and painted around 50 vehicles and associated terrain pieces.

Mostly aimed for the latter stages of the North African conflict (late 1942-early 1943) British and DAK.

Brit Force. A mix of Crusaders, Grants, Valentines and "Honeys"
I will add the Italians and maybe some earlier vehicles as I go as well as buy some metal infantry + associated anti-tank guns to complete the set.

As these armies grew I thought I might try out Iron Cross with them as I've had these on the shelf for a very long time. But then I started looking through my library and re-discovered my old favourite rules - BKC - Blitzkrieg Commander (version II).

The bulk of the DAK force is made up of Mk IIIs
I may well get back into these as they are eminently suited to desert warfare.

The British Recce Troops - Humber and Dingos
To buy this little lot in metal would probably have set me back £150 + with the terrain on top. To print out used one kg of PLA filament costing just £16 delivered from Amazon.

It did however take a lot of printing time! Each vehicle/terrain item taking on average 1.25 hours to print.

The teeth of the DAK - Marder III, Stug III and Tiger 1
The terrain items range from a ruined ancient temple, through flat topped houses to an oasis and various sand dunes and rock formations. All downloaded free from Thingiverse.

Halftracks ready to transport DAK infantry
I'm really pleased with the results so far as this is a period I've always wanted to try out, but never got around to. It is of particular interest to me as my late father served in Egypt during the latter stages of WW2 and his older brother is buried there following his death at the battle of el Alamien.

It all started with a solitary Grant Tank. I was so pleased with it I couldn't stop printing!
Better get that order for figures in....the sooner I do the sooner I'm ready to go!

Friday, 24 April 2020

10mm Update....ACW & MoCB

A quick update on recent activities.

My ACW 10mm project is ticking along nicely. I finished a unit of Rebel Infantry to use my last 25x25mm mdf bases and moved on to the artillery limbers & teams as these would use 25x50mm bases (of which I have loads).


On completing these my mdf order from Products for wargamers arrived! So I'm now good to go with the rest.


My first subjects will be the artillery pieces & crews together with the divisional & Corps commander bases. After this I can return to finishing my infantry and cavalry figures.


My first two village templates for 10mm MoCB are now finished and I'm very pleased with how they've turned out. I've a new 3D printer arriving today so will use that very soon to print of some more buildings and fences to allow me to complete the other four.


The M113 APCs are also finished and look the part. I will add some more vehicles (and hopefully helicopters) to the game as time allows.

Wednesday, 22 April 2020

RFCM Men of Company B (MoCB) - in 10mm Part One

I'm starting to gain some momentum with my 10mm Vietnam project and thought I'd post an update.

This set of rules first came to my attention 10 years ago when I bought the original version (The old crappy photocopied and comb bound version,  on random coloured paper!).


The hardest thing I've always found with Peter Pig rules (RFCM) is to get beyond the presentation.....hopefully one day, someone will have the balls to tell them they need the services of a professional graphic designer!

Once you are over that, and start to read through you generally find a very innovative and workable set of rules.


Recently they've gone through a re-vamping exercise. Re-writing the rules and expanding them as well as printing them on glossy paper and using spiral binding!!

Many are all the better for it, some are not (i,e Regiment of Foote!) and there is a noticeable increased move towards grid based gaming. If you are OK with this, all well and good, if not you're doomed.

The original MoCB was a good game, the new version I've yet to try. However it has been expanded over the original to cover pilot rescue, fire-base attack and straight Red on Blue combat.

One of the requirements of the original search & destroy game is the "Cache Loop". This decides what you find following your searches and like many features of RFCM rules appears to be an excuse to have you buy yet more items from their range!! I guess it's a business model that worked well for GW so why reinvent the wheel?


Now as I'm going to be using 10mm figures I thought a scaled down version would be in order. I'd seen a rather nice mdf version of the Cache Loop both on the PP site and Warbases and I thought "how hard can this be?".


I bought myself 4 x Four Penny sabot bases from Products for Wargamers and glued them together. I then glued this assembly to a sheet of mdf left from another project and there you are.


The notes in the centre are double sided and laminated, so suit either the search and destroy or the White Star scenarios. All I need to do now is produce some little markers (ambush, arms caches etc.) on pennies to place in the sabot slots.


Meanwhile I've almost completed the first village templates (I need six in total) built on scrap mdf (that came with my son's baby's self-assembly furniture packaging - never waste anything eh?) using entirely 3D printed terrain pieces - huts and fences.


The base was then coated with bird cage sand on top of PVA and painted up with cheap craft paints.


Just some greenery to add - a bit of flock and some grass tufts I think - and they will be finished.


In total I will need 20 terrain templates (each 200x100mm approx.) for the game of which the 6 villages are just a part. Still a fair deal of work to do.....