E-Mail:

If you enjoyed visiting this blog, please feel free add a comment after the article in question :-)

Search This Blog

Showing posts with label What a Tanker. Show all posts

Friday, 1 May 2020

3D Printing - New Skills Discovered!

I've treated myself to a new 3D printer to, hopefully, allow me to make even more use of the wonderful designs people are sharing for free on the interweb.

I splashed out nearly £400 on a Creality Ender 5 Pro, from Technology Outlet in the UK.

This came as a part-assembled kit, well packaged and taking only an hour to fully assemble ready to go.

So far I have to be honest that I have had some issues with filament feed that are not fully resolved as yet. So far Technology Outlet's support (via e-mail) has been good, but we're not there yet.

One of the BIG issues I had (if not THE biggest issue) with my original Wanhao i3 Mini was bed adhesion. It had no heated bed so I was dependent on glue sticks etc. In the end I adopted a covering of masking tape topped with double sided sticky tape. This worked well but the tape residue was very difficult to remove.

The other issue was the tiny print bed, which limited me to 1/100 scale models at the very largest.

Two features of my next 3D printer would have to be;-

  1. Heated bed
  2. Large print area
The Ender 5 Pro has both 😁 (in fact the print bed is 220x220x300mm)

Now until now I've always been in the hands of these clever souls who can either design 3D models from scratch (what a skill to have!!) or those who are able to tinker with existing designs to make them easier to print.

For the uninitiated, printing for example, a tank hull as one piece will require your 3D slicing software to attach supports to the print to hold up overhangs and gaps (i.e. mudguards) while the printing material is built up.

Afterwards this need to be removed which can be a bit of a pain. I've seen people raise this as an issue with Butler Printed Models...but it's unavoidable if you print one-piece.

Recently there has been more activity with people designing from the floor up models that are broken down into pieces so they can where ever possible, be printed without the need for support. In addition some helpful characters have take existing one-piece designs and "chopped" them up into parts to achieve the same result.

Until now, I had to hunt these highly desirable re-designs down on where ever I could. But maybe not any more!

After reading a brief post on Facebook, I realised that there was a free to use Microsoft 3D editing package - 3D Builder. This, apparently, was one of the easiest apps in which to slice up 3D models ready for printing. In fact you can design with it, and print direct from it if you wish.....all too much for me to cope with just now!

However the slicing function excited me.

So last night I bit the bullet. I took the simple version of Marco Bergman's Churchill IV in 1/200th scale and set about making it an easy print version for my 1/144th scale What a Tanker collection.

It took a little while to get the hang of the tools, but I have to agree it is very easy to use. First, I enlarged the model from 1/200th scale to 1/144th by enlarging it 150%. Then I took the hull and sliced off the running gear panniers from each side and laid them down on their inner faces. I also sliced off the turret boss from the turret.


The model was now in five pieces and saved as 5 separate .stl files.

These were imported into Cura, my 3D Slicing software of choice, and turned into a single G.Code file ready for printing.


This morning the model took just 1 hour 40 minutes to print out perfectly!

You'll probably spot that I sliced a little too close to the turret boss recess!
 I use a brim of material around the model to eliminate any risk of warping/lifting.


Once completed this easily pulls off, a quick bit of tidying up and it was ready to glue together. The material I use is PLA which is best glued with superglue. 


The finished (unpainted) model is here for you to see. I now feel a whole new chapter of model editing is opening up to me and I cannot wait!


Monday, 30 March 2020

What a Tanker - Dashboards

Another part of my "Colours Stash" that I found on the "Shelf of Shame" was two mdf WaT Dashboards produced by DarkOps (https://www.darkops.co.uk/products/what-a-tanker-mdf-dashboard).


I bought these on a whim from a third party vendor using my last £10 at Colours '19. They retail at £5 each, but buying in multiples from the manufacturer gives you increasing generous discounts!

No assembly instructions are included, but there are assembly photos on their website which you can follow. To be honest its not rocket science!

I started by separating all the components from their mdf "Sprues".

First step was to glue the middle piece to the plain back sheet of mdf. I used PVA and clamped it overnight, but if you're in a rush you could do this with superglue.


While this dried I assembled the two dials and four sliders. Care is needed with the sliders, as they are easily damaged (well by someone as ham-fisted as me, anyway). Obviously leave the two "Gear" shaped pieces off the assembled dials as these go on after everything has been assembled with the dials and sliders sandwiched in the middle!


At this point I thought I'd give the areas of the rear sheet that I thought would be visible after assembly a coat of matt black paint.


As well as the sliders and dials. I later had a rethink and repainted the dials in white.


While all this dried I tackled the two top sheets. I sprayed them both using PSC Spray cans - one in Olive Green the other Dark Yellow. Then I set about painting in the pre-engraved wording. This was a mistake...... talk about soul destroying. I stuck at it and completed the Olive Green version with matt white paint and a small brush. But when I came to the Dark Yellow version I cheated and used a Black Sharpie. Both were given a quick spray of matt varnish to protect them and dull down the Sharpie ink.


The dials had their numbers hand painted in with Red paint and the symbols on the sliders were picked out in Red or Green.


When everything was dry the top sheet was glued to the back two sheets with the sliders and dials sandwiched in between in their appropriate slots. Once again, these were clamped until the PVA dried over night. The two "Gear" shaped knobs were added to the dials (this time with a little superglue).


And that was it, finished. I produced some paper templates to fit into the right hand section, using PowerPoint, and I will eventually laminate these so I can write on them with wet wipe pens.


I rather like these. The recesses for the Command and damage dice are welcome as using the original plain paper versions was problematic if you knocked the table! The sliders provide unambiguous evidence of your tank's status but I'm not so impressed with the armour & strike dials as the windows are little too big and you can see bits of the numbers either side. At £5 (or so) each, they represent quite an investment if you are playing larger games, but if you were just buying one for yourself to take to a group game not nearly so bad.

Well worth a look for any WaT players.


Monday, 4 June 2018

What a Tanker - First Game AAR (Part Two)


Move Four. The Panther has a clear line of sight to the advancing Cromwell. The target is acquired, aimed at and a shot taken. To my surprise this only resulted in temporary damage and the reduction in command dice to 5D6.


Bizarrely, a return shot from the Cromwell’s 75mm resulted in a mirror image result to the Panther!


Finally Tiger and Firefly both manoeuvred into better firing positions ready for the next turn.


Move Five. The Tiger had the initiative and took a first shot at the Cromwell causing the crew to bale out.
The Panther failed to get the dice scores to shoot at the Firefly ……everything but the 4 to shoot and no Wild Dice to be seen! Then the same thing happened to Firefly leading to a stand-off.


Move Six. The Tiger, however, continued its slow advance and took up a firing position against the Firefly. 


Critical hits against the Firefly left it burning, but the crew baled out to fight another day.


Not an altogether unexpected result given the points imbalance, but a god (if very quick!) game all the same.

The switch back to inches from cm. was a success making things far more dynamic and fast paced.

Once I got into shooting, the mechanism really is very simple and I managed to survive off a quick play sheet I downloaded from the TFL Yahoo group’s pages.

I rather enjoyed myself as this works very well solo. There’s plenty of unpredictability built in (praying for the right command dice etc.) so the inevitable “helicopter” overview doesn’t matter at all.

I think I got the terrain density about right. It provided sufficient cover if you chose to use it (Cromwell crew please take note) without slowing movement down too much.

Whilst I only played two tanks per side, the rules are simple enough that I could have easily fielded twice that many.

The 1/150 (N scale) worked well. A good balance of visual spectacle combined with compact playing area.

I shall definitely be back for more….

Tuesday, 22 May 2018

What a Tanker – First Game AAR (Part One)


I’d laid out the terrain on my Deepcut Studio’s 4’x3’ mat. I’d pretty well used all the suitable terrain pieces I have to try and give a “realistic” Normandy feel to the table.

I’d decided to keep things simple for my first solo game, and had chosen the Sherman Firefly & Cromwell for the Allies and a Tiger I & Panther for the Axis sides. Now I know there is an in balance in points here (something like 28pts. vs. 40pts. in favour of the Germans!) but it was just an exercise to become familiar with the mechanics.

The Allies were playing left to right and obviously the Germans in the other direction. As I’m using ‘N’ scale (1/150) AFVs I opted to go with centimetres in place of inches – more of which later.

Moves One & Two. The Firefly advanced over the slight rise and headed for the hedgerow cover beyond. The Cromwell advanced alongside the Firefly. Finally, the Panther and Tiger moved forwards onto the road, very cautiously.

End of move 2
 The dice rolls at this point had really only allowed for movement or re-loading (even with Wild Dice!) so when the Cromwell managed a couple of acquisition dice I checked to see what could be seen.
you've been lasered!
Using my newly purchased (J) laser pointer I could easily check what cover appeared along the line of sight. This showed there were 4 minor obstacles along the way so no way could I spot my intended target (L).


Move Three. Saw the Firefly move forwards again, only a short distance (it’s rated slow in the rules so maximum 2 move dice). However it rolled 3 acquisition dice which allowed it to acquire the Tiger.
The Cromwell continued to advance using the hedge for cover and the Tiger took up position against the low wall ready to try for a shot.


The Panther (fast) seized the opportunity to “race” to the crossroads where shots against the Cromwell and/or Firefly would be a distinct possibility next move.

End of Move 3
Then I had to stop as dinner was ready!

Thoughts so far (three moves into first game)? 
  • Playing solo the lack of correct dice types to carry out actions is very frustrating – slowing the game down to a crawl. If however this was a multi-player game I think that hoping and praying for the correct dice mix could be exciting!
  •  Adopting cm over inches I think has proved an error. I will play the remaining moves using inches to try and speed up the tanks getting into combat.


Friday, 11 May 2018

What a Tanker! - Ready for first try out

So I'm ready to give it a go.

"A Firefly cautiously advances towards the village...."
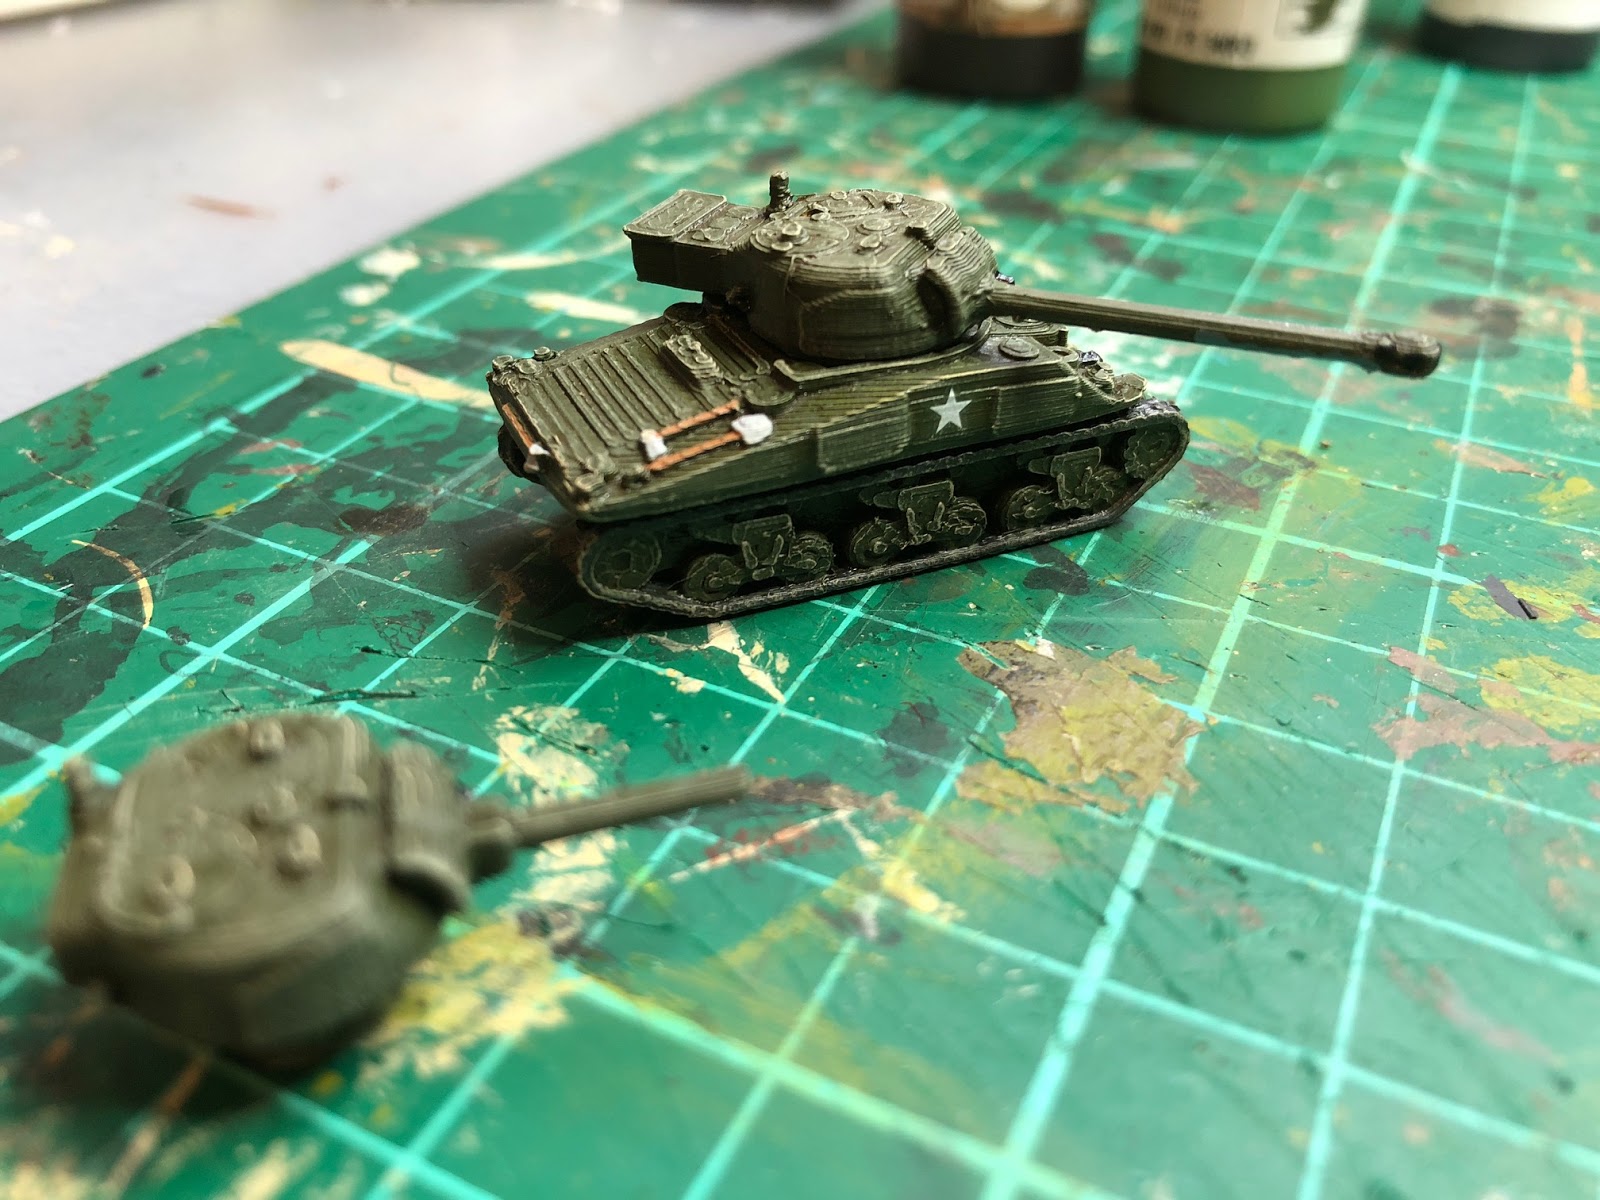
All my 1/150th 3D Printed tanks are painted, markings added (from old Dragon kits) and varnished.

  • Tiger I
  • Panther
  • 2 x Sherman M4 (Firefly or 75mm turrets)
  • Comet
  • Challenger

I've set up a 4x3' play area with a good selection of terrain pieces to break up line of sight. Whether this will work or not remains to be seen.


I'll let you know how I get on....

Tuesday, 8 May 2018

What a Tanker!


Well just like so many of us Wargaming Sheep, I followed the calling and bought myself the new TFL Rules Set “What a Tanker!

I was drawn in by the launch offer of hard copy, pdf copy and all the tokens for £24 – how could I refuse?

As ever the order arrived promptly and having had a quick flick through, look to be produced to similar standards to CoC and IABSM. I love the Commando Comic references in the artwork …..needless to say I was raised on these stories and it’s probably where my interest in WW2 stems from in the first place.

I’ve always liked the idea of a tank skirmish battle that doesn’t take itself too seriously. I tried GF9’s “Tanks” but was somewhat disappointed with them. Some of the manouvres allowed by the rules were just wrong and of course there was nothing to stop any megalomaniac opponent fielding the world’s supply of Tiger tanks!

I’m therefore hoping the TFL offering will better meet with what I was looking for.

Now I’m not planning to write a review – plenty of other people can do this far better than I – but I do plan to post my preparations for trying them out and perhaps an AAR.

First decision -  I’d rather try the rules using a smaller playing area – my 4’x3’ Deepcut Mat. So I looked at using my existing 1/200 AFVs.

Second decision - I’ve decided that my eyes are perhaps too old for this, so I’m going to try them out using 1/144 (n scale) AFVs instead – using cm instead of inches.

Much of my existing 10mm scale terrain works well with either scale,  so I’m good to go there. I also have a few Dragon 1/144 models in my display cabinet, but decided to leave these be and to create some new playing pieces with my 3D printer.


You can see from the pictures that I’ve tried a few new printing techniques to reduce the amount of cleaning up of support material they require. The Sherman, Panther & Tiger I models were all Marco Bergman files printed “disassembled” after having been revised by Chanson836 (Found on Thingiverse).


After cleaning up the models were straightened using the hot/cold water technique, before supergluing them together and filling any gaps. This, believe it or not, takes much less time to complete that cleaning up a solid model (like the Cromwell, Challenger & Comet that took about an hour to rid them of their support material) so has proven to be a great success.


Whilst the level of detail on these miniatures will never match a Dragon model, they easily pass the “Two Foot Rule” i.e. they look great from 2 feet away! Plus, as they have been created from proper scale drawings they are also correctly proportioned – something not all our current n scale manufacturers are able to claim!


Once completed the models were all given a light undercoat of white primer before finishing in their national colours.


More to follow…..!