Below is the turn-by-turn account of what happened. As well as the outcomes, I’ve tried to record my obvious errors & learnings along the way.
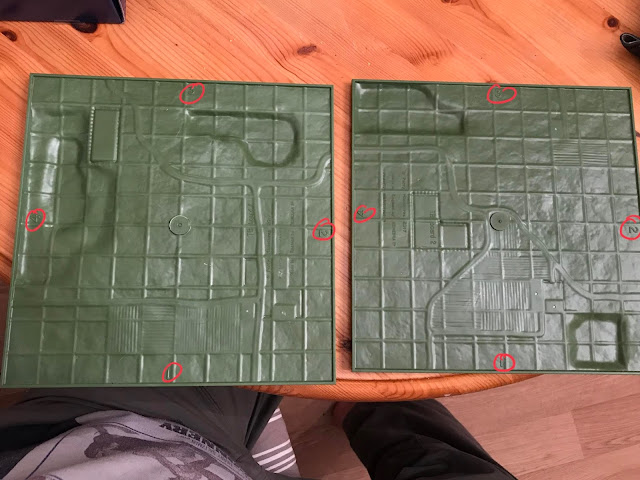
Games Set-Up: Firstly, both sides diced to see which board edge would face them. The board edges are numbered 1-4 so you roll 1D6 per board to decide which edged faces you. If you score 5 or 6 it's your choice!
 |
| Numbers are moulded on the underside |
The armies (named for this article; Red & Blue)
were then broken down into three brigades each. For simplicity, I opted to go
with those shown in the rule book.
Red diced and won the 1st pick for deployment,
which meant that Blue had the first move. Without thinking, I placed Red’s
right-hand brigade artillery unit in a position where they couldn’t fire (Doh!).
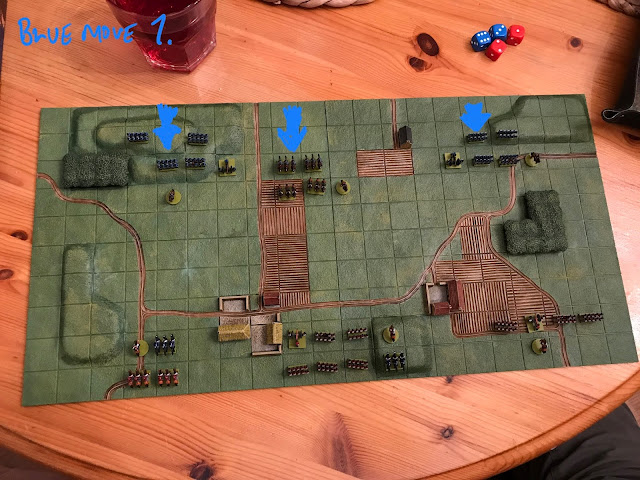
Blue Move 1: All three brigades began their advance
across the board.
Red Move 1: I moved up the Red infantry as they are
safe from contact yet (no ranged fire for infantry, just hand-to-hand) and I’ll
put them in square formation next move (takes one full move to do so).
The Red left-hand artillery fired at a Blue target 5 squares
away. They rolled a 6 (=hit) but followed up with a 3 for effect (= carry on
regardless)
Blue Move 2: Their left-hand artillery moved over to
put them in a better position to fire next time.
The Cavalry began a charge in the centre. The infantry moved, but this may have been an error – perhaps they should have moved into square?
The Cavalry began a charge in the centre. The infantry moved, but this may have been an error – perhaps they should have moved into square?
Red Move 2: The left-hand cavalry charged home (Light
cav. Vs. Guards!) forcing the Blue Brigadier to fall back 2 squares. The centre
infantry units split themselves between the built-up area and moving into
square formation. This left their Red Brigadier separated and would mean they
cannot move next turn. The right-hand infantry units spread themselves out ready
for action.
The artillery unit in the centre opened fire. Requiring a
3-6 to hit it scored 3. However, a damage effect score of only 2 meant the
target could carry on regardless.
The right-hand artillery suffered a similar result.
The left-hand cavalry charge met with more success. 2 Red
bases vs. Blue base resulted in a score
of 9 vs.6 – Blue loss and 5 vs. 1 another Blue loss!
Blue Move 3: The left-hand artillery unit needed
>1 to hit. They rolled a 3 hitting the target but then rolled a 2 = carry on
regardless. The right-hand artillery unit also tried a shot, needing a 5 or 6 to
hit. Scoring only 3 this was a miss.
The Blue heavy cavalry charge reached the Red Guard Infantry
in square formation. The first Blue unit rolled 1D6 vs. 2D6 for the Red Guards
(with a re-roll option). Blue scored 4 whilst Red initially scored 2 (1+1) but
on a re-roll scored 5 (+4). This meant a difference of +1 in the Red Guards
favour. This pushed the cavalry base back one square.
The next Blue heavy cavalry unit rolled 4 vs. 10 for the Red
Infantry (2D6 again, 4+6 rolled). This was a difference of >3. A Red win and
the losing base being removed from play.
Finally, the two Blue light cavalry units charged one Red
light cavalry unit. This gave Blue 2D6 rolling 7 (5+2) vs. 1D6 for Red who only
rolled a 1. This was a Blue win that was >3 so the Red base was removed from
play.
Red Move 3: Two cavalry units (1 heavy and 1 light)
engaged Blue infantry in square formation. This gave Red and Blue 2D6 each. Red
rolled 6 (4+2) and Blue 3 (2+1), a difference of 3 meaning a Red win and the
Blue base being removed from play.
Then there was a cavalry vs. artillery hand-to-hand
engagement. The Red cavalry having 2D6 and the Blue artillery only 1D6. The Red
cavalry scored 6 (4+2) and the Blue artillery only 2, a difference of >3
meaning a Red win and the Blue base being removed from play.
Finally, the right-hand Red artillery tried a shot but
missed, only scoring 1.
Blue Move 4: Once again, the Blue heavy cavalry in
the centre charged the Red Guard Infantry in square formation. This time the
Blue Cavalry used their re-roll ability after an initial score of 1, resulting in
a final score of only 2! The Red guards countered with 2D6 rolling 8 (5+3), a
difference of 6 meaning a Red win and the Blue base being removed from play.
Next, two Blue light cavalry units engaged a Red infantry
unit in square formation. Blue rolled 10 (6+4) vs. Red rolling 6 (5+1). The
difference of 4 meaning a rare Blue win and the Red base being removed from
play.
A Blue guard vs. Red guard infantry class resulted in Blue
scoring 4 and Red scoring 6. The difference of 2 meaning the Blue unit was
driven back to the edge of the board. Once their it took a rally test scoring 2
on 1D6 = fail! The Blue unit being removed from play.
Finally, the remaining Blue artillery tried a shot but
missed, only scoring 1.
Red Move 4: Two Red heavy cavalry units + one light
cavalry unit charged Blue’s infantry in square formation. The resulting score
for the Red cavalry was 9 (4+2+3) vs. a score of 5 for the Blue infantry (3+2).
The difference of 4 meaning another Red win and the Blue base being removed
from play. This destroyed the first Blue Brigade. One down two to go?
The Red guards in square formation engaged the Blue light
cavalry unit and with a difference between scores of 5 - 10 (5+5) vs. a score
of 5 - destroyed them.
Three Red infantry units (1 guard, 2 standard infantry) make
a devastating attack on a lone Blue Infantry unit, scoring 17 (6+6+5) vs. only
2. A difference of 15! As ever, the Blue base being removed from play.
Blue Move 5: Whilst the remaining cavalry in the
centre withdrew, but the right-hand infantry units made one more attack. The
first Blue infantry unit scored 3 vs. the Red infantry scoring 6! Another Red
win and the Blue base being removed from play. The other Blue unit fared little
better with a score of 5 vs. a Red guard infantry score of 7 (5+2). The
difference this time being 2 resulted in the Blue unit withdrawing to the board
edge and taking a rally test. This was passed with a score of 6, but with the
remains of the brigade scattered to the four winds, the Blue force capitulated and
handed victory to the Reds.
Conclusion: Now I’ve read a great deal on line about
TravelBattle – some very good, some quite critical. Personally, I really
enjoyed.
I think the rules are easy to learn, thought provoking and
quick in use. I think the fundamental point for reviewers of this product is to
remember IT IS A GAME – NOT AN HISTORICAL SIMULATION.
Once you’ve got that in
mind, you can judge it objectively for what it is….a beautifully produced war game
that is loosely based in the horse and musket period.
I love it and would recommend it most strongly to anyone
else who may be interested.


