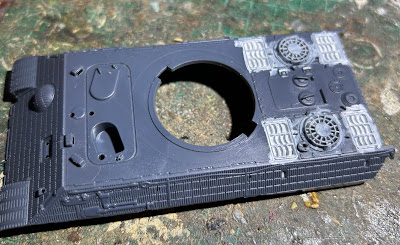
Another of the models bundled in with the Achtung Panzer starter set. A joint venture between Italeri & Warlord the parts are incorporated in just two sprues.
The model is moulded with Zimmerit coating and was crisp and flash free.
There are a couple of areas to take care with, especially as the Warlord build instructions are somewhat simplified and vague.
The simplified running gear comes moulded as one piece with a separate outer drive sprocket. The track lengths are split in two – top and bottom runs. When attaching the sprocket be careful to align it correctly (it only has partial drive teeth) and note that while it appears to have a “keyed” location pin, this is not the case.
The engine cooling vents are open with no detail behind them. You could simply paint the space behind in matt black, but I covered the underside with gaffer tape to seal the gaps.
I opted to leave off the tracks to make painting easier. I’m not sure this was the best option, however, and I’ll explain why later.
The hull top needed a bit of masking tape to hold the glacis plates together while the cement went off, but otherwise everything went together really well.
The turret is a simple construction with well defined Zimmerit and has to option to leave the gun barrel moveable. I opted to fix mine in place. I left the top turret hatch open to accommodate the included tank commander half figure.
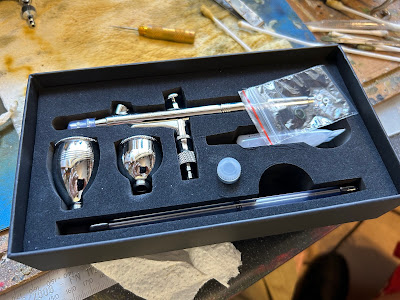
After priming in white, I gave the whole vehicle a coat of Vallejo Air Dunkelgelb using my new compressor & airbrush. Once dry I over sprayed a striped camouflage pattern of Rotbrun and Olivegrun.
When dry I, I applied the included decals using Vallejo decal fix & set.
Most of the hull detail is moulded in place, and whilst a little low on profile & detail, paints up OK.
I then gave everything an overall spray of Vallejo brown wash to help pick out the Zimmerit pattern.
Now it was time to fit the tracks. These had been sprayed on the sprue with Army Painter Plate Armour, before a coat of Vallejo Black Wash and finally a coat of Army Painter Rust Wash. The very last step was a dry-brush of Vallejo Silver on the high points.
I realized (too late!!) that the tracks are “handed”. They should be fitted with the points where you removed them from the sprue, on the INSIDE (i.e. out of sight). Armed with hindsight I won’t make this mistake when I assemble the second model - I will leave off the running gear and attach it complete at the end. But in this case, to get the upper run of tracks to fit, I had to remove some track teeth.
I’d read elsewhere that they were not a good fit, and indeed this was the case. It was very difficult to get them to meet at both ends and I ended up having to make a tiny bead of filler to close the gaps, before repainting. To ensure the tracks were held down on the upper surface of the heels I slotted in a short section of sprue which would be out of sight when I attached the side plates.
Finally,
when all was complete, I gave it an overall dry-brush of Vallejo Iraqi Sand followed by a coat of Ammo Colours Lucky Ultra-Matt
varnish to tie everything in together. This really is the very best matt
varnish I have ever used.
What do I
think of the model? Well as a completed kit it looks very good. It definitely captures
the look of the Panther. On the downside, the tracks could have been a much
better fit and I wish the pioneer tools and tow rope had a little more
definition. On balance I would like to compare it to Rubicon’s offering to see
who has the better version.


Maybe a simple model Tim but you have done an excellent job with it. Looks fantastic!
ReplyDelete