As I mentioned previously, I first saw these kits at the Crusade Show in Penarth back in January. I tried to persuade Will to sell me just one sprue so I could build a tank to try it out, but he was having none of it!
So I took the plunge and bought a whole box for £16.50 (@ £3.30 ea).
 |
| All you get by way of a construction Guide is the exploded diagram on the box. |
So how did they go together?
 |
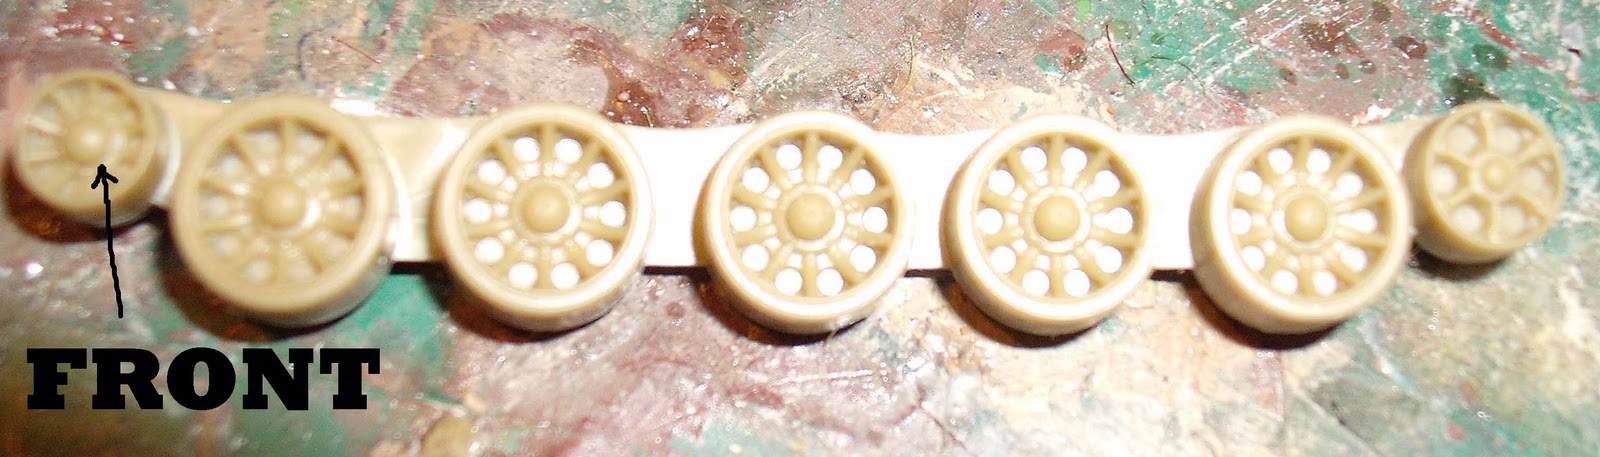
| The front idler has the most spokes |
The first thing I had to do was work out which way round the wheel sets should fit (see above) I found that bending them just slightly so they bowed towards their inner face meant that when they were glued to the assembled hull they stuck flush rather than trying to bow away from the sides.
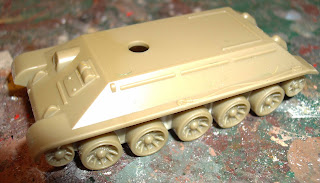 |
| Fit of parts is really rather good. |
The mouldings were all crisp and free of flash and went together easily with Humbrol plastic cement. You need a bit of modelling skill to get it right as the parts lack locating pins/guides etc. but to be honest you don't need the brains of an Archbishop to achieve this!
 |
| Finished - less tracks |
In all it took about 10mins per vehicle to assemble them less their tracks. I opted to leave the tracks off to make painting easier. I drilled out the end of the barrel, to give it a bit more realism, with a 1.5mm drill bit.
I've assembled all five as T34/85's as I'm not sure what part of the War I will be fighting yet, but I thought it more likely to be the latter battles (Berlin etc). The spare T34/76 turrets will either be painted as alternatives, or possibly used to make some defensive positions (Tobruk turret style).
I have to say I'm most impressed with these. Good value, good quality and top marks for the choice of turret.
See part two for the painting stage..........


No comments:
Post a Comment