Once the models were all assembled (less their tracks) and the glue thoroughly dry it was time to commence the painting phase.
 |
| First undercoat with Army Painter White Primer |
Being an unreformed tight arse, I have tried a number of cans of budget car primer over the years, but have come to the conclusion "
you only get what you pay for" and now I stick to quality primers only (Vallejo, GW etc). They cover better, loosing less detail and at the end of the day they are specially formulated to take acrylics!
 |
| Next - airbrush the top coat. |
I use a
Premi-Air G35 Airbrush and am very happy with it so far. This is powered by a small mains Hobby Air compressor I found on ebay for £35. I use Vallejo Model Air paints, which are ready formulated for airbrushing, allowing me to get a large number of vehicles base coated in very little time. In fact it takes longer to clean the blooming airbrush than to do the painting!
I've always used Vallejo
Russian Green as base coat for my British vehicles and now I've used it for my first ever Russian ones as well!
 |
| First coat on and drying |
It takes two coats to cover the White primer, but little time to dry between coats. I mounted the turrets on plastic strips with BluTack to ease holding them while painting. You'll notice there's a battlefront Sexton in the background getting its base coat as well.
 |
| Now a wash to bring out the shadows and give a worn appearance |
Once the base coat was dry, I sprayed the vehicles with Vallejo Sepia Wash to pick out the shadows and to give that overall worn appearance to the finished item. You'll see in the photo that the wash is still drying. When dry it has a perfect matt finish a will look more subtle than it appears above.
 |
| Now to focus on the tracks |
While the hulls and turrets dried I turned my attention to the tracks. These I'd left on their sprue as it made it easier to paint them. Each received a coat of primer, followed by Vallejo Dark Grey. Then, when dry, a coat of Vallejo Sepia Wash to highlight all the wonderful detail and finally a dry brush of Light Grey to pick out the tread etc.
 |
| Dry-brushed highlights |
Now the hulls and turrets were dry I was able to dry-brush a highlight coat of slightly lightened Russian Green over each model. This picked out the engraved detail beautifully.
Other details were picked out. The hull mg in black, the tips of the exhaust in rust followed by Vallejo Smoke glaze and the moulded on tow cable in light grey. The whole model was then very lightly dry-brushed with sand paint to pick out the very edges of track guards, turrets etc.
 |
| Adding the tracks |
|
The tracks could now be added. Fairly straight forward here, it's pretty obvious that the undulating track goes on top to sag from wheel to wheel and the straighter one goes on the bottom. Just make sure you have the track edge link detail outermost and ensure that the moulded track tooth guides are visible between the wheels.....if you've done all this you've got it right!
 |
| Tracks and final highlighting in close-up |
The two track sections meet well with minimal gap and once the glue has dried, a quick touch-up of the original painting scheme is all that's needed to finish them off.
I like my vehicles based, so I bought appropriate mdf bases from the
Warbases stand while I was at Crusade. These were coated with Vallejo Grey Pumice and left to dry.
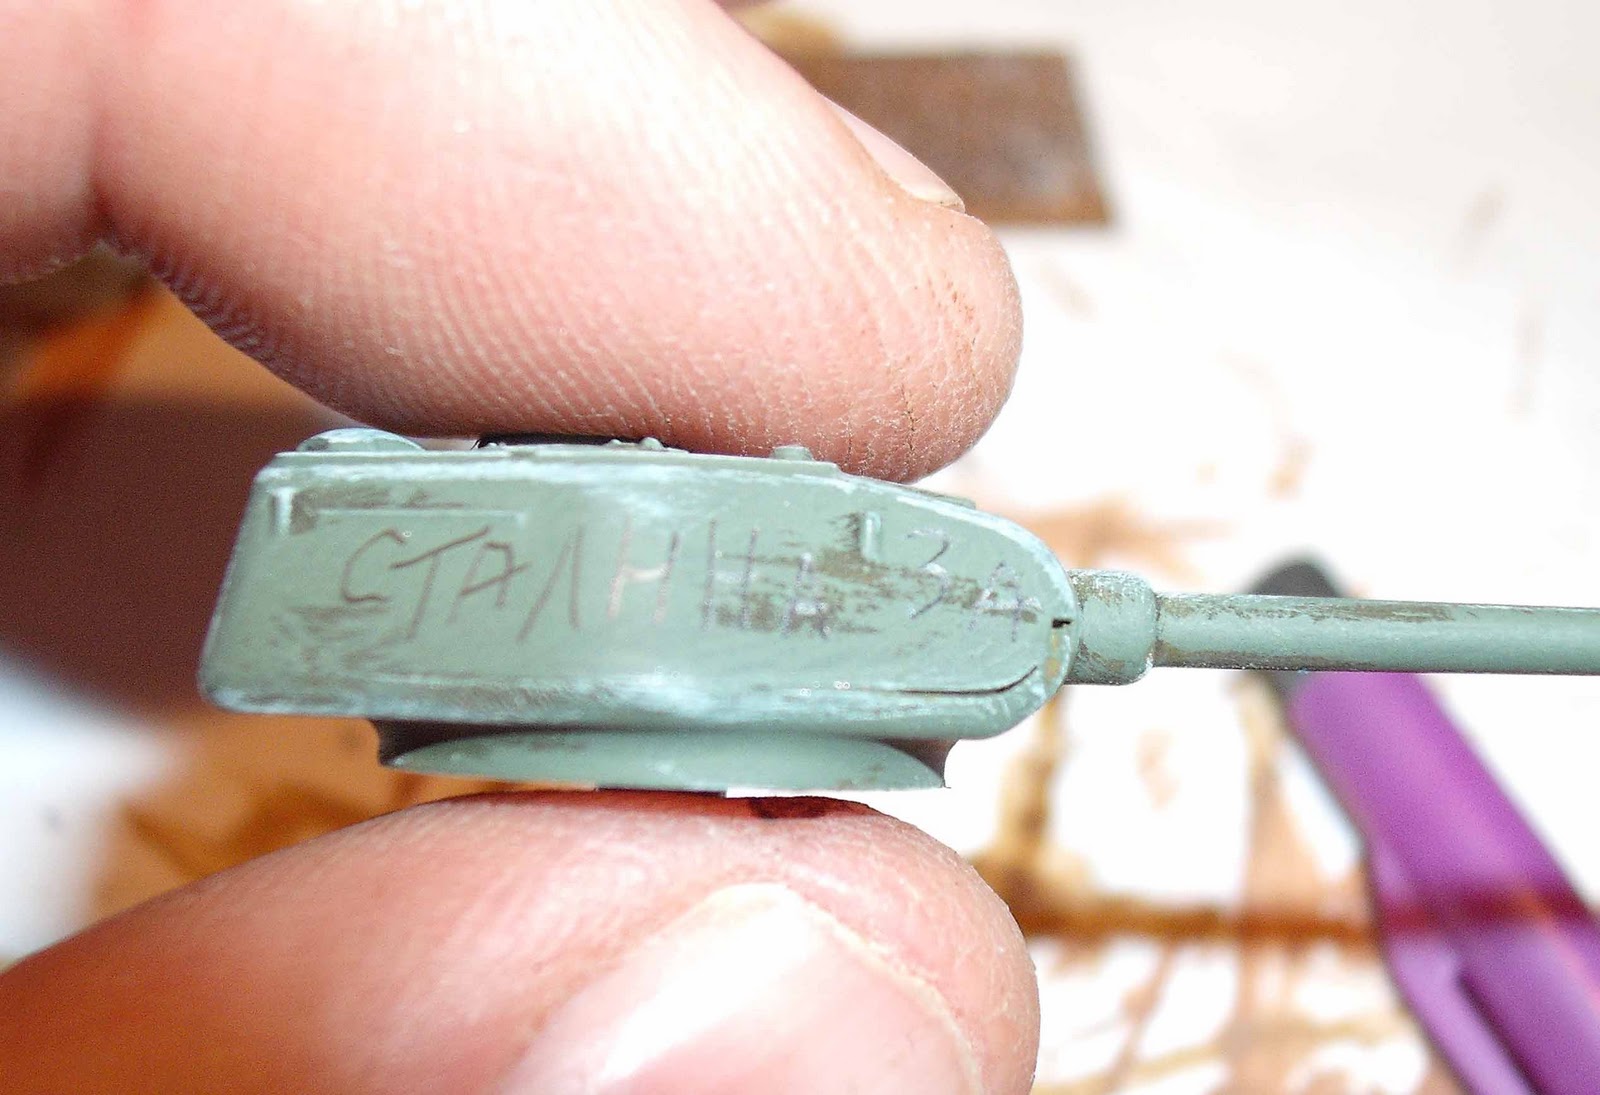
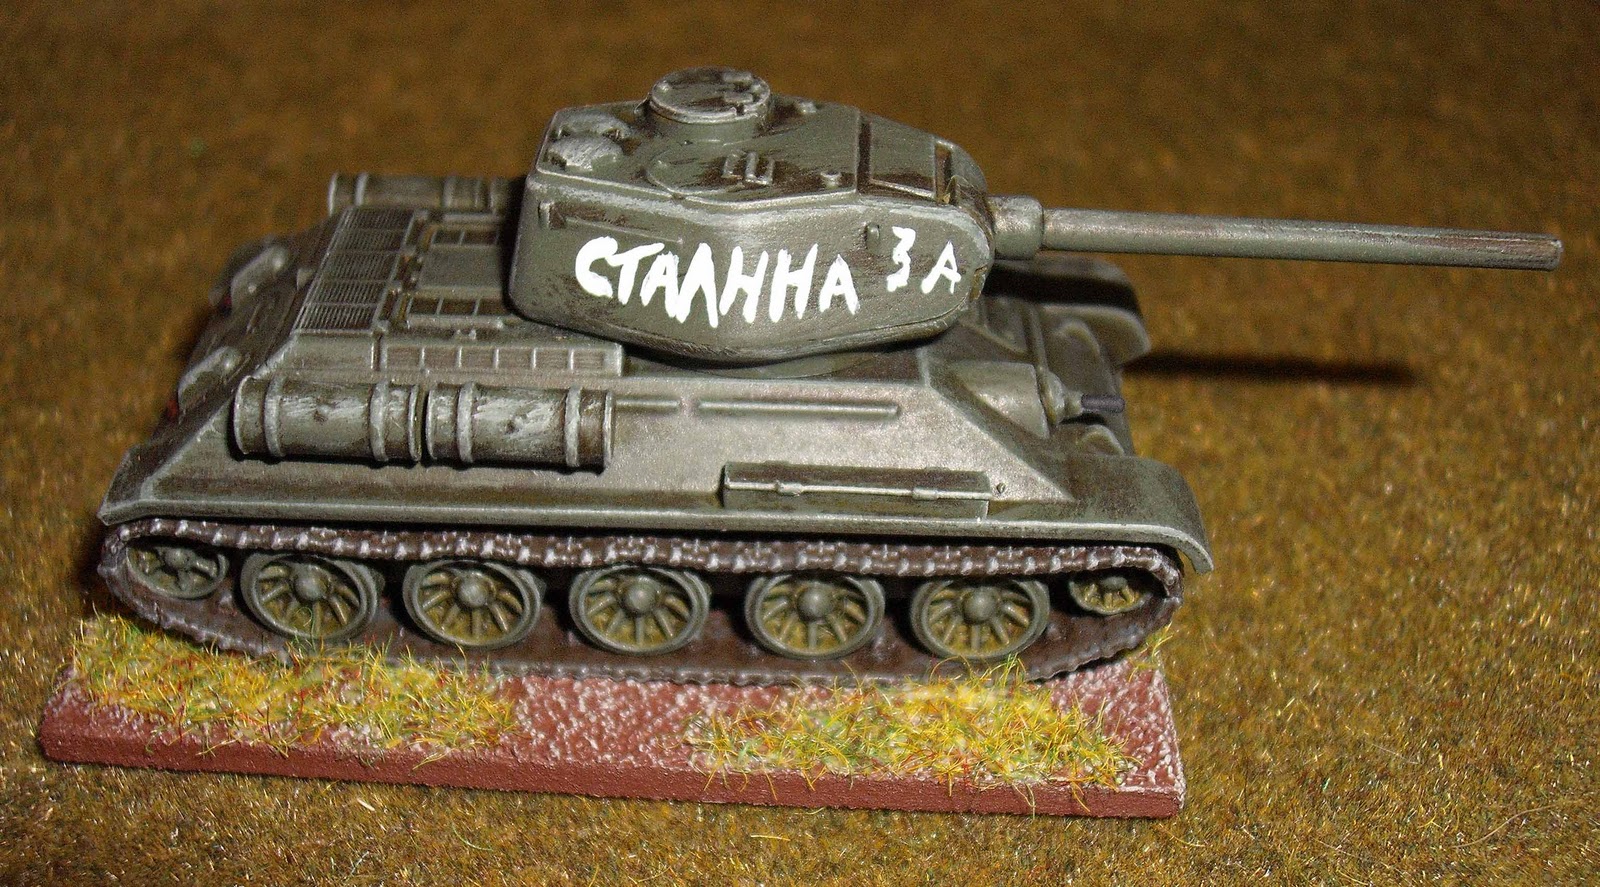
I decided that a plain green T34 was a bit boring, so I got on the Interweb looking for some good old Russian graffiti to add to the turrets.
 |
| Hard to see it, but as a guide I transferred the design to the turret in pencil. |
The slogan was hand painted on in white. Then, to finish everything off, the pumice coating was painted earth brown (I use those cheap craft acrylic paints for this, costing about £2 for a 59ml bottle) followed by dry brushing with sand paint. The tank was secured to the base with PVA, the whole thing sprayed in GW Purity Seal and finally Army Painter Anti-Shine Matt Varnish. Once all was dry a bit of Jarvis Summer Meadow static grass was glued on with watered down PVA. Job done!
 |
| The finished article |
Conclusions:
Pros. -
- The sculpting is very fine and the moulding flash free.
- They go together well with little call for any "fettling".
- They are good value at £3.30 each
- With the optional T34/76 turret they are even better value!
 |
| And here it is with PSC 15mm Russian Infantry |
Cons.-
- I think some people will moan about how many parts there are to assemble and how long this takes (In the same way they moan when comparing Perry plastics to Victrix plastics) such is life!
- The instructions, whilst adequate, could have been annotated to give a bit of guidance to the un-initiated. (see comments in the text above)
- I personally didn't like the fact that you can see the holes in the hull sides (behind the tracks) when assembled. Personally, I would have moulded holes rather than slots in the hull sides to avoid this?
- Whilst the models are good value, I think PSC will have to keep an eye on such companies as Forged in Battle to ensure their products are priced to maintain that value. You can buy the FiB Tiger for as little as £6.30 from some discount suppliers which is very good value for a high quality item in resin/white metal when compared to Battlefront etc.
To sum up, I think these are fantastic little models and I cannot wait for the next release.
Now lets get ready to go to the WMMS Show tomorrow.........


Excellent Photo's Tim. If I wanted to make one, then I would know how to do it.
ReplyDeleteA very good review Tim,these PSC models have turned out very nicely.
ReplyDeleteI've been intending to buy some of these T34s for my AK-47 project.I'll attempt to fill the holes in the sides after fitting the wheels,thanks for the tip.
Cheers,
Paul.
Thanks very much indeed for the two posts on the PSC T34s. I've recently started wargaming again and your posts were significant in choosing to buy a box of these tanks. I've written about this at http://theplayerofgames.wordpress.com/2011/04/22/plastic-soldier-company-t34s/. Thanks again for an informative and thought-provoking blog.
ReplyDeleteGeorge
Thanks for the review. And impressive result!
ReplyDeleteGreat work.
ReplyDelete