
As part of my cut price stash from the IPMS Avon show, I bought a Rubicon M5A1 Stuart for £12.

I decided I’d paint this up as a British vehicle but in its delivered Olive Drab colour.

As with every Rubicon kit I’ve made, it comes with two sprues & decals bagged separately and a very clear and detailed instruction booklet. The parts are moulded flash free in a light grey hard plastic and offer a number of options for the builder.
 |
| Turret completed with hatch open and test fit for Warlord figure |
There’s early, mid and late production engine deck details, turret MG armour shield, turretless MG armed recce version, mudguards on/off, Cullin hedgerow device, turret hatches open/closed…… plenty of choices.
 |
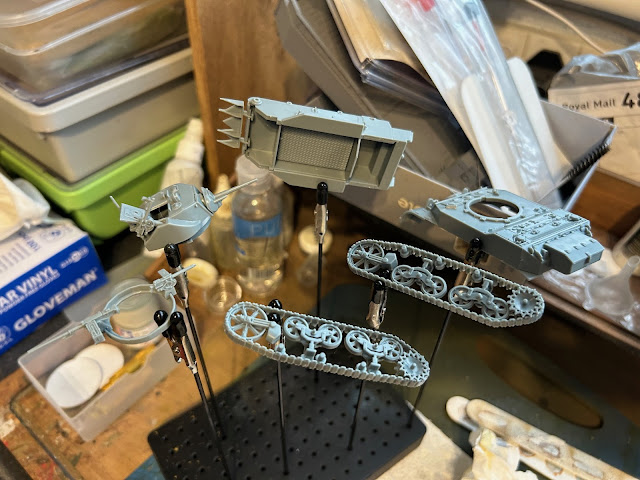
| Track units before assembling inner drive sprocket and suspension details |
I built the model more-or-less following the instructions; however I left the track units off to ease painting.
 |
| Main lower hull components include a checker-plate floor which you will see if you opt for the turretless recce version |
 |
| The completed sub-assemblies awaiting primer |
There really weren’t any issues during assembly, it took less than 30 minutes including cleaning up the parts! The only small point I’d note was that the front mudguards are moulded as part of the hull, whilst the rear mud flaps form part of the combined side mudguards. I cut these off and attached them individually as this is where divisional and unit markings would be displayed.
 |
| Matt White primed sub-assemblies |
 |
| Parts just clipped together to illustrate the Recce Version. You have the choice to swap turret for MG ring after you've finished the model so you really have two vehicles in one! |
Once assembled, I spray primed all the finished sub-assemblies with matt white. I thought I’d try my hand at “pre-shading” so sprayed all the areas of shade with a dark Panzer Grey before giving the whole AFV a spray coat of Vallejo Olive Drab. I’m not convinced this made any real difference though, so I need to experiment more.
 |
| Track units carefully sprayed in Olive Drab, to leave tracks dark grey |
I was careful to only spray the running gear Olive Drab, leaving the track in Panzer Grey as it is of the rubber pad type.
 |
| All the weathering finished prior to pigments and matt varnish |
Weathering consisted of firstly dry-brushing the entire model with lightened Olive Drab to give some variation across the AFV’s panels. I then painted the pioneer tools and applied the decals.
 |
| What the vehicle looks like in Recce mode there were another two .50" MGs you could add! |
Next, I used Army Painter Dark Tone wash around all raised detail and shadow areas. When all was dry a light dry-brush of Vallejo Iraqi Sand was applied overall.
 |
| After the first application of pigments |
I used Army Painter Rust Wash to treat the track joining pieces and ran a few rust streaks around the tank where I thought they’d naturally occur.
 |
| Finished model with re-applied pigments😅 |
Finally, a new one for me, I used some Vallejo Earth Pigment powder to further weather the vehicle. This looked really good until…..
 |
| In the colours of a Guards Division Brigade HQ vehicle. Note the rear mud flaps taken from the side mudguard moulding |

I waited
until all was dry and re-applied the pigments and this time fixed them in place
with dilute PVA.

I added a spare commander figure from the Warlord Sherman Firefly and I was done.
Fantastic
little model, highly recommended.
No comments:
Post a Comment