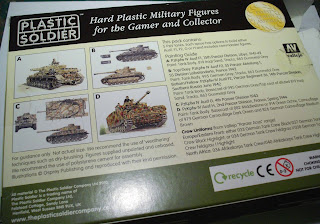
The packaging states that the model can be made up as a variety of different marks of the tank. This makes perfect sense when you think this is what the Germans were doing with the real thing throughout WW2.
It is stated that the kit makes up the Mk.F1, F2, G & H models of Panzer IV. I see on a number of Blogs there has already been some debate on this....so I don't plan to add to this other than to give a quick overview on what I know to be the differences between these marks of tank.
- Difference between F1 and F2 - simply the new long barrelled 75mm gun instead of the old shorter one!
- Difference between F2 & G - Vision ports eliminated from turret, new muzzle brake, means of swapping coolant between vehicles, possible smoke dischargers on turret and addition of Schurzen plates.
- Difference between G & H - new external air filters and single piece commander's hatch.
Once again, there's a single sheet set of instructions included - which I have to say are barely adequate without additional reference material. I guess it's all part of the "Simple to Assembe Wargame Vehicle" thing - i.e. make the instructions look as simple as possible so you don't put them off? But personally I'd have liked to see a bit more detail.
All the parts for each AFV are moulded on a single sprue in light green polystyrene. Detail is very good though there is a little flash on some of the finer parts.
There are five sprues plus one instruction sheet in each box.
The main areas of flash are the supports for the turret and hull Schurzen plates. Nothing that cannot be easily tackled with a sharp craft knife.
One thing with a simple exploded diagram as an assembly instruction is that you can choose your own building order. I decided I'd try and assembly the vehicle in three sub-assemblies to ease painting.
- Lower hull and running gear
- Upper hull
- Turret
The lower hull comes complete and just needs the pre-moulded running gear gluing on each side. There are separate Rear Idler and Drive Sprocket outer wheels to be added. These glue in shaped holes so you cannot have them the wrong way round. The outer edge of the Drive Sprocket lacks teeth ready to accept the tracks. See Below.
Above are the upper hull parts separated from the sprue.
Now this is where the lack of detail on the instructions starts to bite..... What is the piece left over in the photo above?
Well it's the MkH's external air filters! and they go here. See above.
There are a number of extras you can add to individualise your model if you wish. These include two spare road wheels in a bracket (to fix on left hull side), two loose spare wheels (rear deck if you like ?), a tool box and two Jerry cans - the last three items should be positioned with care or you won't fit the Schurzen plates. Best added at the very end.
It's time for a break now.....Part Two to follow.


Outer drive sprockets really should be glued on after the tracks are put on. Much easier. Weakness of the instructions, there. Good write up.
ReplyDeleteMany thanks for this walkthrough. I recently picked up a set of these Panzer IVs and the placement of the air filters had me stumped.
ReplyDeleteI looked at a couple of youtube assemblies but your blog was the only one that made mention of the air filter.