E-Mail:

If you enjoyed visiting this blog, please feel free add a comment after the article in question :-)

Search This Blog

Tuesday, 16 January 2018

Team Yankee – Hammerfall Starter Set

I made a start of the plastic kits that came with my Hammerfall set this weekend.  The set comes with two M1 Abrams and three T64s. In addition there is a quick start guide with assembly instructions, an A5 version of the original Team Yankee rule book, some 2D cardboard terrain, dice and some tank commander half figures.
I started with the M1 kit which comes on two sprues in a horrible shade of green. 
You have the option to produce the original M1 with 105mm main gun or the IMPM1 with the 120mm Rheinmetal cannon and some other minor mods. I chose to build the later.
The hull and running gear goes together really well. There is nice detail on the tracks and the side plates are nicely engraved. There is a choice here of which guards go over the drive sprocket.
The turret halves go together easily and it is at this point you have a choice of stowage racks to fix to the sides.
The position of these was not entirely clear to me from the assembly instructions included, so I referred to the Battlefront website, where all became clear.
There was one US tank commander (in white metal) include with the set so I chose to model the cupola hatch open.
There are also nice renditions of the commander’s .5” HMG and loader’s GPMG to add to the turret. A nice touch here was to include two of each, in case you broke a barrel or something removing them from the sprue.
The turret was finished off with the environment sensor mast and a selection of stowage for the basket (jerry cans, boxes, spare wheel etc.)
Altogether a nice little model. Goes together well, good detail and captures the look of the real thing.

This prompted me to remember I still had two Zvezda 1/100 M1 Abrams in their boxes, as yet unmade. Why not build them too so I could do a comparison?

Monday, 8 January 2018

Team Yankee New Plastic Soviets – Painted Part One

My plan was to complete painting of these figures whilst they were still attached to the sprue to see if this was a feasible alternative to my usual mounting on lolly sticks.

So first job was to spray white primer. This had to be done in two stages (one face at a time) using my usual Wilko Matt white primer.
Once dry the basic uniform colour was applied. The colour I chose for this was Vallejo 70.880 Khaki Grey.

When this was dry an all-  over coat of Army Painter Light Tone wash was applied and left to dry. Then when dry an all-over dry-brush of Khaki Grey + White.
The figures were now ready for the details to be picked out.
  • ·         Belts and weapon butt stocks – Leather Brown
  • ·         Gasmask satchels and webbing straps – German Camo Beige
  • ·         Buckles – Boltgun Metal
  • ·         Boots – Black
  • ·         Face & Hands – Flesh
  • ·         Helmet – Russian Green
  • ·         Facings – Red
  • ·         Weapon – Black Grey
  • ·         Magazine – Orange Brown

Finally the flesh areas received a Vallejo Flesh wash, the webbing a Light Tone wash and the weapon metal areas an black wash.
The bases were painted using cheap craft paint – “Coffee Bean” – which appears to perfectly match the plastic Battlefront base colour.
Now all that’s left is to tone the bases and add some flock etc.


Verdict: Nice figures to paint. Crisp detail that’s easy to pick out and benefits from washes and dry-brushing to enhance it’s appearance. It would be hard not to make a good job of these to be honest.

Tuesday, 2 January 2018

Loser Shed

My daughter bought me, for Xmas, a lovely hand-made slate sign to adorn my Wargames Den.
 So it is now officially named!
They simply don't appreciate the hobby!!

Rommel 2mm

Found some time to finish off my Rommel Divisions over Xmas. All the Irregular models are now based and have their unit stats attached.

The allied army represents a 1944 Armoured Division (i.e. 7th Armoured) but I have brigades of both Cromwell and M4 Shermans so I can recreate other units if required.  Armoured Infantry bases have the addition of a M5 Half-Track whilst motorised infantry have nothing (I forgot to order trucks!)
 The German army is based on the Panzer Lehr Division of 1944. There is a choice of Tiger I or II bases as support and I have more infantry that should be the case, again to allow me to represent other units when required.
I’m now looking at how I might store these when not in use. I think the whole game lends itself to being highly portable, so will consider this when planning my options…..

Team Yankee - New Plastic Soviet Infantry

I received Battlefront’s Hammerfall starter set for Team Yankee as an Xmas present. This contains 5 AFVs, rules, dice, some cardboard 2D terrain and a quick start guide. Very good value if you ask me as it’s advertised as £22.50 from Firestorm Games.
   To increase the variety I decided to treat myself to the new plastic Soviet infantry that Battlefront has recently introduced. In addition I went for the support weapons set as well.
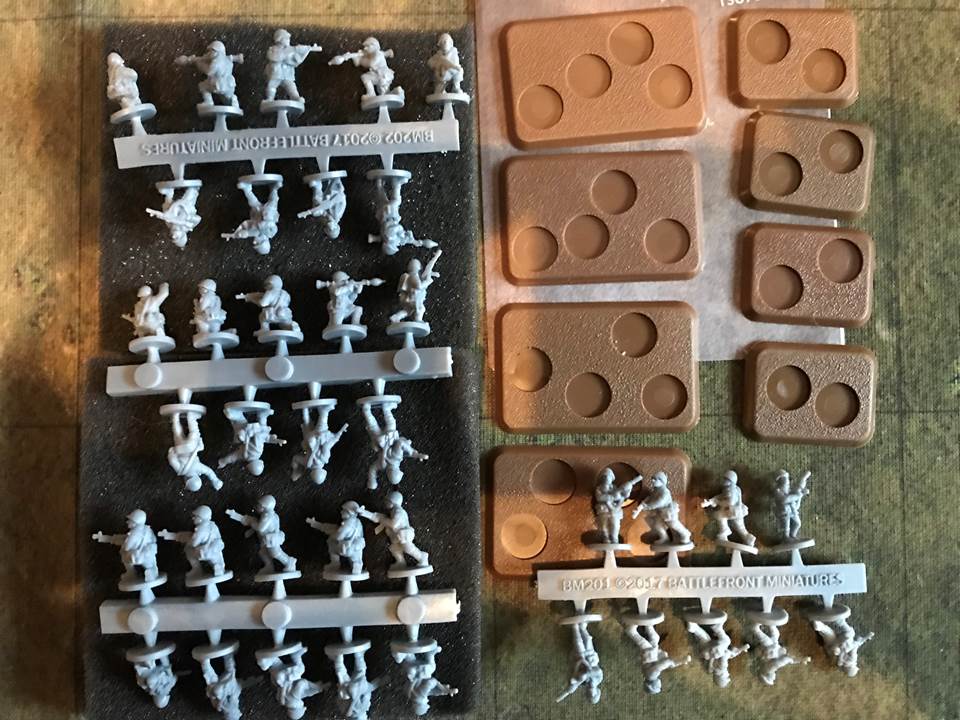
These figures (I believe) are based on the original sculpts for the white metal figures that came with the launch of TY and are moulded in a slightly flexible ABS material.
The figures all appear to be cleanly moulded (no flash) and as the material is flexible, it has allowed quite complex shapes to be recreated (unlike PSC figures that are sculpted to match the moulding process).
There was some evidence of bending to weapon tips, but this is easily rectified by immersing the entire sprue in near boiling water. The ABS internal memory kicks in and the parts return to their correct shape and immediate immersion in cold water retains the shape.
 The figures don’t take normal plastic adhesive, but seem to glue just fine with super glue. Those needing the minimum of assembly were the SPANDREL launcher figure and the AGS 17 Grenade launchers.
The infantry platoon set was just £5.40 from Firestorm, and whilst the blurb on the Battlefront site states that there are sufficient figures for 4 medium bases (4 figs each) and 4 small bases (2 figs each with RPGs) there were in fact four sprues containing 37 figures in my pack….what a bargain!
These include figures with AK74 + Underslung Grenade Launchers, Figures with RPK74 LMGs, an officer, Radio Operator and NCOs as well as infantry with AK74 and RPG18s, RPG7s etc.
All nicely detailed and well moulded.
In addition there are unit cards for the game. Theses cover all the possible APC combinations allowed, BMP1, BMP2 & BTR60. There are only sufficient bases included for the stated amount so if you want to use the extra figure you’ll have to raid your spares box.
The support weapons platoon includes 6 Spandrel teams (based three to a large base) and 3 AGS 17 Auto-grenade launcher teams (again based three to a large base). Once again there are unit cards and bases included for just £5.40.
The Spandrel launchers and AGS17 need minimal assembly, as discussed above.
These new style figures, moulded 9-10 per sprue, invite painting whilst still attached as most are connected to the sprue via the underside of their individual base. This will save time with mounting on lolly sticks!


I will post some more pictures as I start to paint the figures. First impressions are very good.

Tuesday, 19 December 2017

Rommel 2mm - Reinforcements

Progress is slow but steady on the Irregular Miniatures delivery I received a couple of weeks ago.
All the figures & vehicles have been based and painted and are now awaiting the addition of a bit of clump foliage to represent trees and bushes.
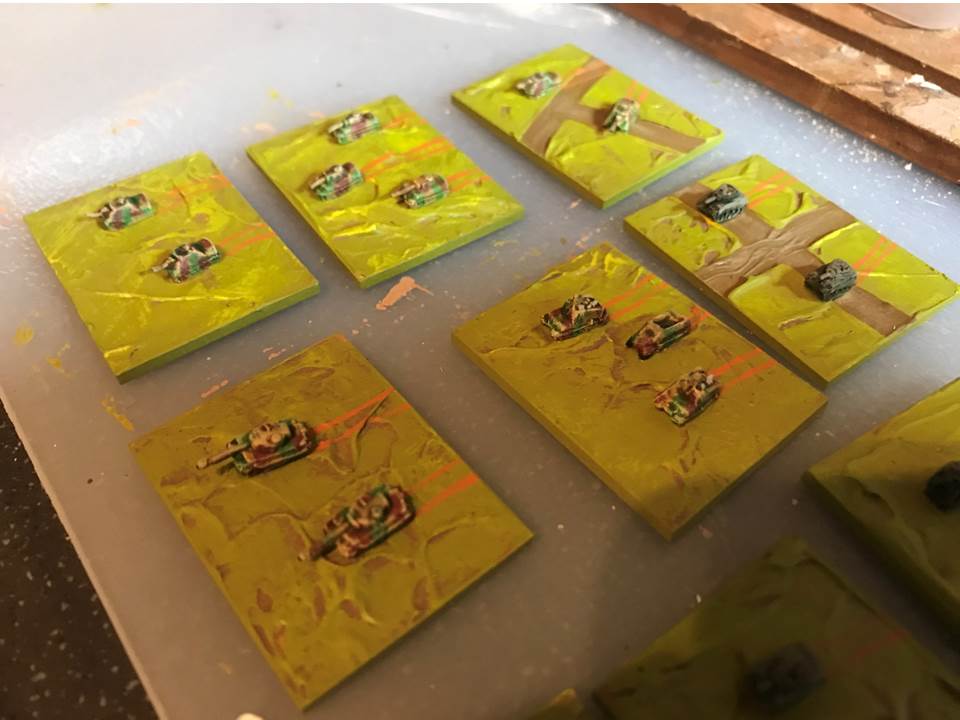
I've created Allied & Axis supply tiles. I chose the hexagonal mdf bases (50mm) so they stand out on the table and do not get confused with fighting units. Each contains a selection of tents, fuel tankers, tank transporters, spare vehicle models and an anti-aircraft gun emplacement. I'm quite pleased with how these have turned out. It was a shame that one of the AA emplacements (on the left hand base) was miscast, but once painted you don't really notice.
Whilst I was at it, I created an airborne landing marker using the new Irregular Miniatures Horsa Glider model (60p each). I know it's not actually a requirement of the rules, but I thought it would be nice to indicate landing zones in any D-Day type games. I will need to produce a few more, but again, I'm pleased with the prototype.
These are my Allied Armoured Infantry - indicated by the addition of an M3 Half-Track per base. The right hand base is a 25 Pounder Battery.
Up until now, my Allied Armour consisted only of Cromwell tanks. Now I have the choice of a Sherman equipped brigade as well.
I've also added some Achilles Tank Destroyers (3 bases each with two models to differentiate them from tank bases), additional Cromwells to make up a full brigade and a Sexton battery (well M3 Priests really).
Finally I bolstered the Panzer Lehr Division with additional Panzerjager bases (2 x Jagdpanthers per base), a Tiger I platoon (nearest the camera) and a self-propelled artillery battery (2 x Wespe + Sdkfz251 Half-Track).

As well as this I've two more BUAs nearly finished and I added an Sdkfz251 to every Axis infantry base to indicate that they are all armoured.

Each base has had a sheet of self-adhesive ferrous paper attached ready to receive a magnetic data label. Hopefully by Xmas these will be ready to venture out onto the table.

'til next time....

Friday, 8 December 2017

Rommel 2mm - Reinforcements

Whoopee....reinforcements have arrived from Irregular Miniatures!
Oodles of 2mm goodness.......
I've ordered a "Town/Suburb" and "Riverside town" terrain pieces to make two new BUA terrain tiles (each 60x60mm) which you can see to the right, top corner of the picture. These come in at a whopping £2.40 each, but make the production of the tiles simplicity itself. All I need to do is smooth around the edges with a bit of acrylic modelling paste, to blend the castings in, and they'll be ready to paint.
A mixture of Sherman, M10 Tank Destroyer & M7 Priest models ready for priming
I've also ordered sufficient miniatures from Irregular's range to build my Rommel forces up to Divisional strength. I will now be able to field a 1944 British Armoured Division with either Sherman or Cromwell as their main AFV (modeled on the Guards & 7th Armoured Divisions) and a 1944 Panzer Division (modeled on Panzer Lehr & 12th SS Panzer Division Hitlerjungend)
I've been knocking together some organisation tables to help me remember who is in which element using colour coding that I'll then apply to the base tags. This is an early draft, but you'll get the drift.

I'd better get on with painting these little beauties up.....

Monday, 4 December 2017

Rommel 2mm - AAR Encounter Battle part one.

Time to try the rules out in anger for the first time….solo.

I opted to go for Scenario 3 in the book – Encounter. 
 This is a simple battle, length ways (narrow edge to narrow edge) across the table. Both sides have two objectives each and to win must control at least 3 objectives by the end of the 12th turn.

Before beginning, both forces are divided in half and one half deploys in the first three rows whilst the other is held in reserve. The reserves get to come on when a combined score on 2D6 rolled at the end of a turn, is less that the number turn you are on.

I used what forces I have – so probably smaller armies than the scenario required. The British force was 52 points and the German 62 points. This exercise was more about trying out the rule mechanisms and learning how the game plays, than replaying a historically accurate event.

I diced for the terrain and laid it out in as balanced a way as I could, either side of a centrally placed river with 6 crossing points.
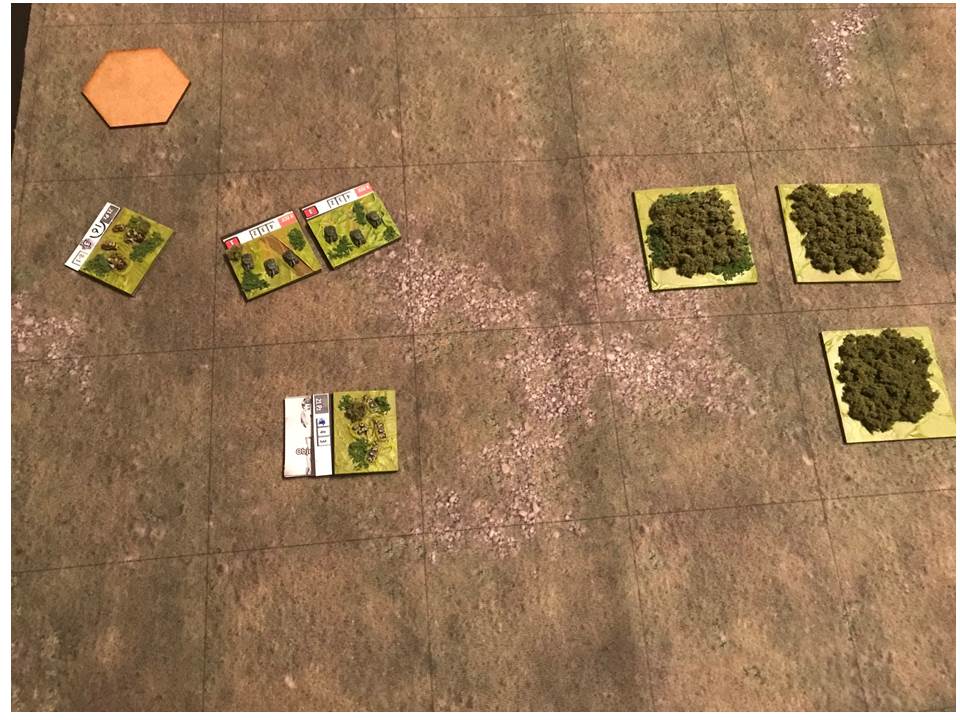
Once the terrain was set I deployed the two armies and I was ready to go. Starting positions were as per the photograph below.
TURN 1: The Brits won the dice-off for for first move and opted for a swift right flanking move with a small battlegroup (top right corner) intending to take out the nearest German held objective (top left corner).

Two Ops bought me a road movement of 6 squares, crossing the bridge along the way. To delay any attack on the British objective (bottom right corner), the armoured unit supporting the holding infantry company, advanced two squares to the bocage area to their front.
TURN 2: The Germans also spent 2 Ops and advanced via road movement to cross the river just to the front of the defending British armoured unit. Here they waited (tipped)  for infantry support to catch up.
TURN 3: Saw the British right flank advance come to fruition with a successful flanking assault on the German dug-in Company at Objective 1. I'd found the mechanisms for combat to be simple to learn and the QRS contains just about all you need to play. I do find it helpful to have a pen and paper handy to work out the opposing combat factors though!
TURN 4: The German Panzergruppe was now ready to pounce. They moved into the attack against the British Armour and although they were tipped and at a disadvantage they succeeded in causing enough hits to  destroy them. This was largely at the cost of spending a large number of Ops on a 2nd round of tactics and then paying for shifts in the number of hits to ensure success.
TURN 5: Having left an Infantry Company behind to hold Objective 1, the British armoured units advanced across the table (Behind enemy lines but not isolated) and prepared to assault the second German Objective.
Once again the objective fell reasonably easily even though the armoured units were tipped. The flanking attack + out-numbering made all the difference! As you can see from the picture, the German artiller was still tipped from supporting the previous turn's attack, so couldn't support the objective.

So at the end of turn 5 the British forces held all 4 objectives, but the Germans were closing in on the 1st British position.
Things were looking Ok for the German forces until the British rolled an 1 and a 3 at the end of turn 5....allowing their reinforcements to deploy in the first row of the British table edge.........

I'm sure I'd probably missed some things in those first few moves, but the rules are very straight forward. The use of Ops to buy events and tactics gives you plenty to think about along the way. Do you just keep buying and taking your 6 (hopefully) new Ops each turn? or do you take a chance and reset the Command Post to free up the most useful Ops again but risk not having enough Ops to pay for them....what a conundrum! Loving it!!

To be continued.